|
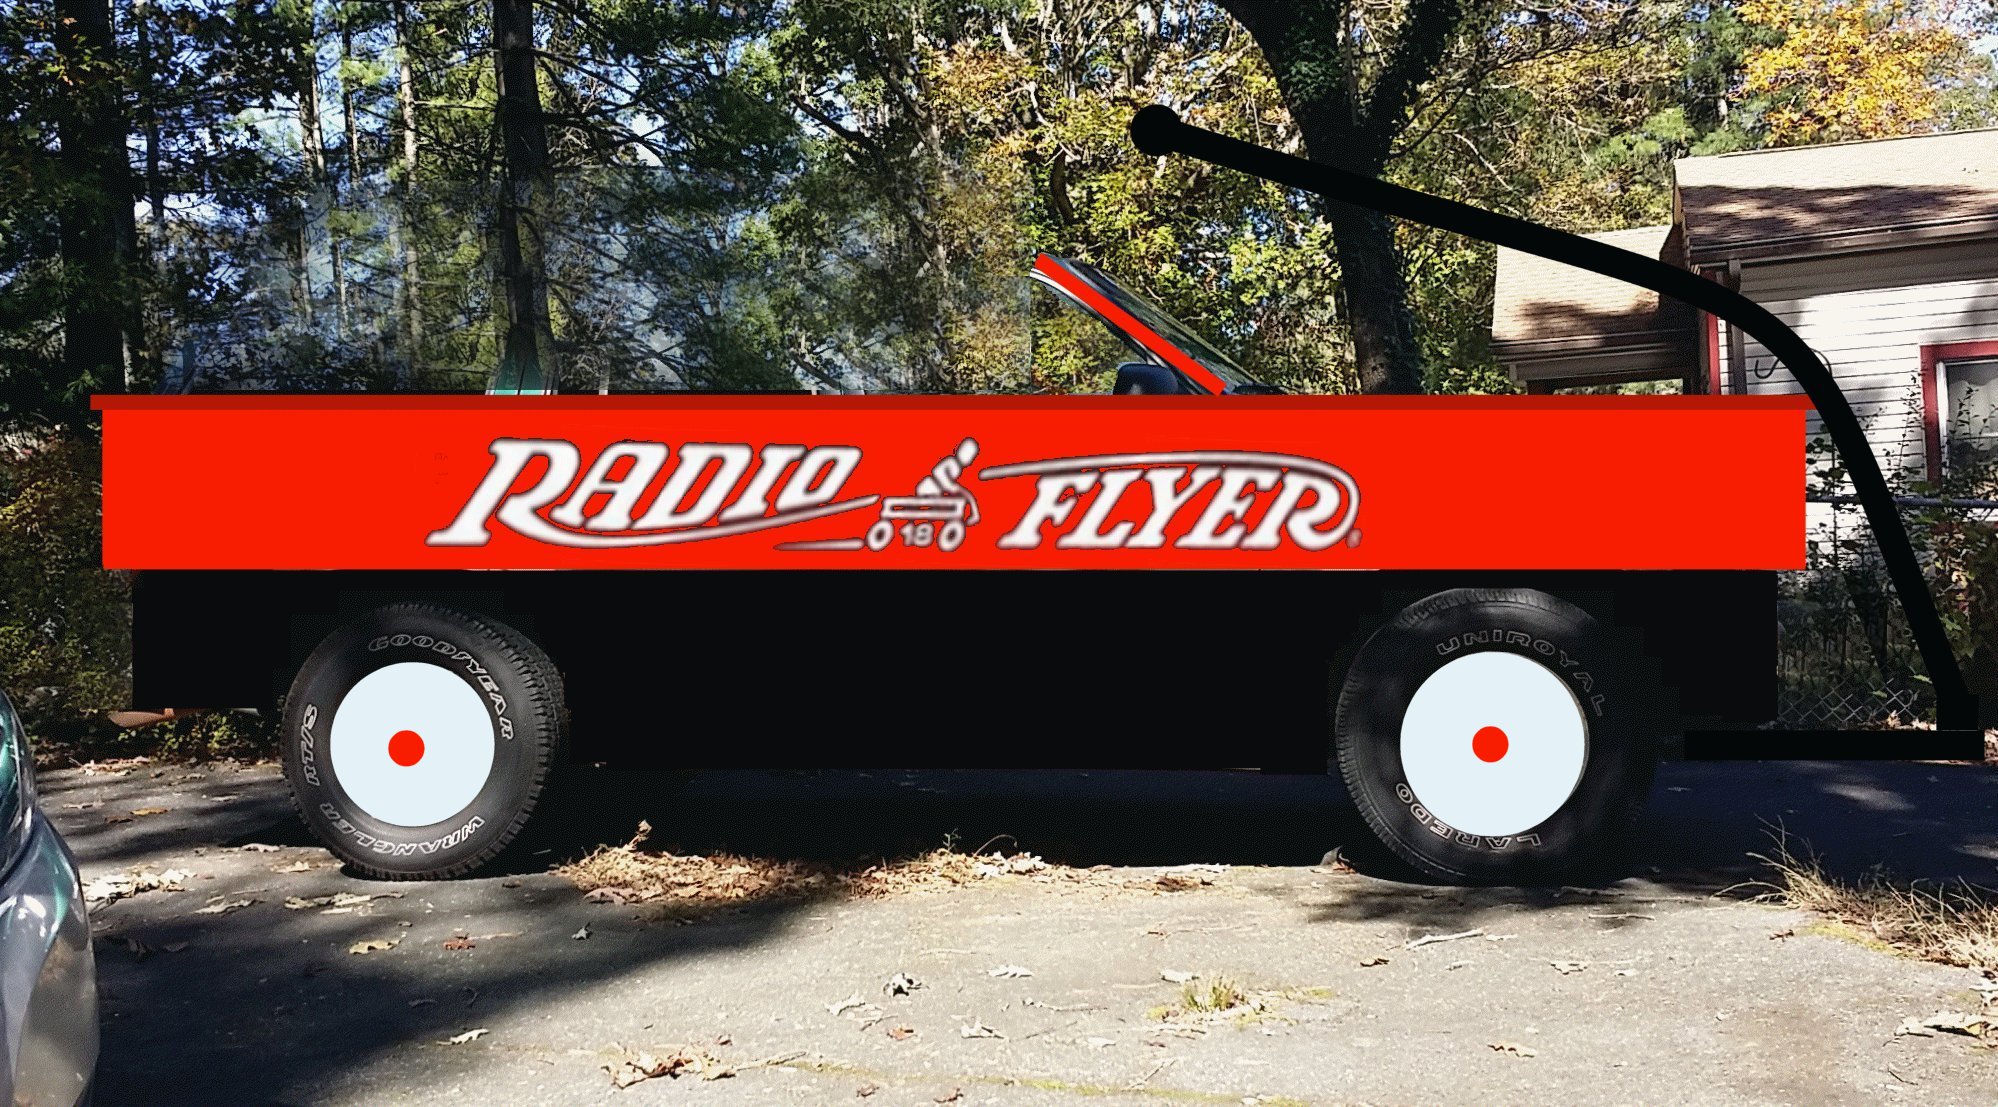
Making a "Radio Flyer" Red Wagon Car |
|||||||||||||||||||||
|
|
|||||||||||||||||||||
|
|
"Radio Flyer" Red Wagon "Won't You Ride In My Little Red Wagon" sung by Willie Nelson "Won't You Ride In My Little Red Wagon" sung by Hank Thompson "Won't You Ride In My Little Red Wagon" sung by Roy Clark The classic Radio Flyer red wagon 
|
|
|||||||||||||||||||
|
My "Radio Flyer" Red Wagon Car Project
|
|||||||||||||||||||||
|
|
|||||||||||||||||||||


2000 Ford Explorer (to be used for its 4-wheel drive chassis) and a 2005 Dodge Grand Caravan (to be used as the basic body for its Sto-N-Go seating - the second and third row seats fold down into the floor and out of sight) then melding the two together, along with a new custom outer body, into a "Radio Flyer" Red Wagon Car |

That will leave the 4 wheel drive chassis to use as the basis for the "Radio Flyer" "Red Wagon" Car. |
||||||
|
|
||||||
|
|
|
|
|
|||
|
2017-12-25 video #1 |
2017-12-25 video #2 |
|
|
|||
|
2017-12-26 video #1 |
2017-12-26 video #2 |
|
|
|||
|
2017-12-27 video #1 |
|
|
|
|||
|
2017-12-28 video #1 |
|
|
|
|||
|
2018-01-02 video #1 |
2018-01-02 video #2 |
2018-01-02 video #3 |
2018-01-02 video #4 |
|||
|
2018-01-03 video #1 |
2018-01-03 video #2 |
|
|
|||
|
||||||
|
||||||

I need to make sure that the chassis has all the necessary wiring harness connections and sections, etc, to work on its own, including things such as: 
This step, when completed, will leave the 4 wheel drive chassis ready to use as the basis for the "Radio Flyer" "Red Wagon" Car. |
||||||
|
|
||||||
|
2018-01-07 video #1 |
|
|
|
|||
|
2018-01-09 video #1 |
|
|
|
|||
|
2018-01-10 video #1 |
2018-01-10 video #2 |
|
|
|||
|
2018-01-12 video #1 |
2018-01-12 video #2 |
|
|
|||
|
2018-01-19 video #1 |
|
|
|
|||
|
2018-01-20 video #1 |
|
|
|
|||
|
2018-01-21 video #1 |
|
|
|
|||
|
2018-01-22 video #1 |
2018-01-22 video #2 |
|
|
|||
|
2018-01-23 video #1 |
2018-01-23 video #2 |
|
||||
|
2018-01-25 video #1 |
2018-01-25 video #2 |
2018-01-25 video #3 |
|
|||
|
2018-01-26 video #1 |
|
|
|
|||
|
2018-01-27 video #1 |
|
|
|
|||
|
|
The 2018-01-28 video #1 is a short video showing some of the tedious work sorting out the wiring harnesses and figuring out which wires I need and which wires I don't need this will likely take 2-3 days. |
|||||
|
|
After another hour's work (after the video ended) |
|||||

|

|
The problem may be the anti-theft system in these Ford Explorers. (The anti-theft system disables the ability to start the engine by any means.)Time to do some mind searching at the Ford dealer's service department to see if the anti-theft system can be bypassed. (Or I may have to use the anti-theft system for its own ability to defeat itself.) |
||||
|
|
I need to: remove as much of the wiring harness as I can get out of the Explorer body; connect back together as much of that original wiring harness as possible; load the chassis up on a car hauler trailer; take it to the dealer; they will connect their scanner/reprogrammer to it; then they can tell me what else it needs, if anything; after which they can reprogram it, taking out the 'theft' issues it set itself into after I removed parts of the wiring harness. No wonder not that many Ford Explorers are stolen ... can't use them for anything except for parts. It sure would be nice if Ford made a dealer 'factory reset' availble which would allow the owner to remove the anti-theft system when using the chassis with a custom body. |
|||||
|
2018-02-04 video #1 |
A short 2 minute look (a 2 hour glimpse) into the very exciting work of ... |
... sorting out the wiring harness. Find which wire connects to which wire, solder the cut wires back together, then insulate with heat shrink tubing. Repeat a couple of hundred times! |
||||
|
2018-02-18 video #1 |
This short (very short) video shows heating and bending one of the tie-rod ends (bent two tie-rod ends, each was 5/8 inch diameter) for the mechanism which will turn the big handle out front with the front wheels. |
2018-02-18 video #2 |
More heating and bending metal ... This short (also very short) video shows heating a length of 1/2 inch diameter all thread rod and making two custom 'U-bolts' so the mechanism can be clamped to the tie-rod ends of the rack and pinion of the Explorer. |
|||
|
FINALLY! Progress and an Update! 2018-03-13 video #1 |
Okay ... done with sorting and soldering the wiring harness back together (at least I think I am done with it) and it is now time to tidy the wiring harness up, clean the mess up, and get the chassis ready to take it to the Ford dealer to reprogram the PCM (Powertrain Control Module) and the PATS (Passive Anti-Theft System) module (which is supposedly keeping the PCM from allowing the engine to start and run). ... Hopefully ... all it now needs is reprogramming ... otherwise I might need reprogramming ... I also installed the accelerator pedal once I had all the wiring harness and mess out of the way. |
|||||
|
2018-03-14 video #1 |
This shows the mechanism, which will turn the big front handle with the front wheels while steering and driving - the big handle will attach to the black bar which moves side to side. |
|||||
|
2018-03-19 video #1 |
This shows the mechanism, which will turn the big front handle with the front wheels with the horizontal section of the handle - the bracket at the end of it will hold the main section of the front handle which goes up and over the front of the Radio Flyer Red Wagon. |
|||||
|
Yeppers! It's ALIVE video. |
IT'S ALIVE! ... IT'S ALIVE! ... |
|||||
|
2018-04-01 video #1 |
|
|
|
|||
|
2018-04-08 video #1 |
The chassis frame rails and other parts were pressure washed yesterday in preparation for painting today. Spray painting the parts of the chassis which may be visible after the Radio Flyer body is installed - painting black so they will blend in with the shadow under the Radio Flyer. |
2018-04-08 video #2 |
Removing relays and disconnecting connectors of things I don't want, and think I can remove without upsetting the anti-theft system. So far, so good, nothing as upset the anti-theft system to where it stops the chassis from running - the next step will be removing/disconnecting the wiring/wire harnesses I soldered back together. |
|||
|
2018-06-06 video #1 |
After a two month delay due to unforeseen circumstances, beginning to get back to work on the project Beginning the work of removing the items added so I could "drive" the chassis and make sure the chassis can run on its own. After removing these items and getting back down to the chassis only, that will be the end of this 2nd Step. |
|
|
|||
|
2018-06-11 video #1 |
Further progress on removing the items added to the chassis so I could make sure the chassis could run on its own. After removing/unplugging each item, I turned the key to "run" to verify that the PATS anti-theft system is still working and doesn't think its has been stolen, then verify by starting it and letting it run briefly. |
|
|
|||
|
2018-06-12 video #1 |
Almost finished removing everything that needs to be removed to leave teh chassis ready for the next step - the body of the 2005 Dodge Grand Caravan for its seating. Of course, that body will need to be made topless first CRAP! There has been a bad thunder and lighting storm going on outside, it just killed power briefly, which shut the camera off - fortunately, the video was not lost ... but I now have to come back and complete it later. |
2018-06-12 video #2 |
Okay, I have finished removing all the items which needed to be removed! AND ... THE CHASSIS STILL STARTS AND RUNS ON ITS OWN! IT'S STILL ALIVE! ... Which basically puts me back to where I was in Late January (Oh Pooh!) ... ... EXCEPT ... IT'S NOW ALIVE! (Most Excellent!) |
|||
|
2018-06-18 video #1 |
Starting to remove the wiring which is no longer needed - see that pile or wiring harness on the floor in the forground at the end of the video? That's the first batch removed. |
This is a tedious process, but not as tedious as it was to solder the wiring back together, but there is no reason to watch me sit with my back to the camera working on the wiring. |
I will wait to video something more interesting, or when I have help sorting out the more complex parts of the wiring harness. |
|||
|
2018-06-23 video #1 |
Continuing to sort out the wiring harness ... wire by wire by wire ... into "this wire is needed" and "this wire can be removed". |
Can you spell TEDIOUS? It's spelled ... B-O-R-I-N-G-! |
... and ... we kept at it for about another 2 hour 45 minutes after turning the video off. |
|||
|
2018-07-12 video #1 |
After months of working through darkness on the wiring ... |
... THE LIGHT AT THE END OF THE TUNNEL IS VISIBLE! |
|
|||
|
2018-07-14 video #1 |
Speeding toward the light at the end of the wiring tunnel ... |
VIOLA! FRESH AIR! AND SUNLIGHT! THE WIRING IS DONE! |
(The wiring is now in the rear view mirror ... not a bad place to visit, but not a place one would want to live!) |
|||
|
2018-07-15 video #1 |
The pressure washing removed the dirt and mud off the parts that were covered by the floor and couldn't be pressure washed the first time. After the chassis dries, I will paint the areas of the chassis which I couldn't paint before. |
|
|
|||
|
||||||
|
||||||


|
|||||||||

This step, when completed, is to have the Caravan top as open as possible, keep the front doors and side sliding doors (no windows in the sliding doors, and no windows behind these doors), and the Stow-N-Go Seats so the seats can be kept folded down and stowed in the floor until need to give someone a ride in the Radio Flyer Red Wagon.. |
|||||||||
|
2018-08-08 video #1 |
2018-08-08 video #2 |
|
|
||||||
|
2018-08-10 video #1 |
|
|
|
||||||
|
2018-08-14 video #1 |
|
|
|
||||||
|
2018-08-19 video #1 |
2018-08-19 video #2 |
|
|
||||||
|
2018-08-20 video #1 |
|
|
|
||||||
|
2018-08-26 video #1 |
2018-08-26 video #2 |
|
|
||||||
|
2018-09-11 video #1 |
2018-09-11 video #2 |
|
|
||||||
|
2018-09-14 video #1 |
2018-09-14 video #2 |
|
|
||||||
|
2018-09-15 video #1 |
2018-09-15 video #2 |
|
|
||||||
|
2018-09-16 video #1 |
2018-09-16 video #2 |
|
|
||||||
|
2018-09-22 video #1 |
2018-09-22 video #2 |
|
|
||||||
|
2018-09-23 video #1 |
|
|
|
||||||
|
2018-10-03 video #1 |
2018-10-03 video #2 |
|
|
||||||
|
2018-10-06 video #1 |
2018-10-06 video #2 |
|
|
||||||
|
2018-11-11 video #1 |
Just a video of a few hours of random work being done ... I'm not videoing all the hum-drum repetitive work - that would be about as exciting as watching pain dry ... once you've watched paint dry once, check it off your bucket list, no need to keep doing that. |
||||||||
|
2019-01-12 video #1 |
2019-01-12 video #2 |
|
|
||||||
|
2019-01-15 video #1 |
Prepping the front piece which will hold the front of the remoovable roof in place - the intent is to have the roof covering on only when it rains. |
||||||||
|
2019-02-05 video #1 |
Measuring and working on the driver's side 'headliner' with the duct for the rear air conditioning/heat and rear ceiling courtesy lights. |
||||||||
|
2019-02-06 video #1 |
Making duct for rear air conditioning and heating Plan A - - OH MAN! THAT DID NOT WORK! - - |
||||||||
|
2019-02-07 video #1 |
Making duct for rear air conditioning and heating Plan B - - DANG IT! THAT DID NOT WORK EITHER! - - (pay no attention to the part after 1:48 of the video) |
||||||||
|
|
Making duct for rear air conditioning and heating Plan C - - SUCCESS! - - (okay, now you can remember what you saw at the end of the last video as that was the result of Plan C) |
||||||||
|
|
Plan C 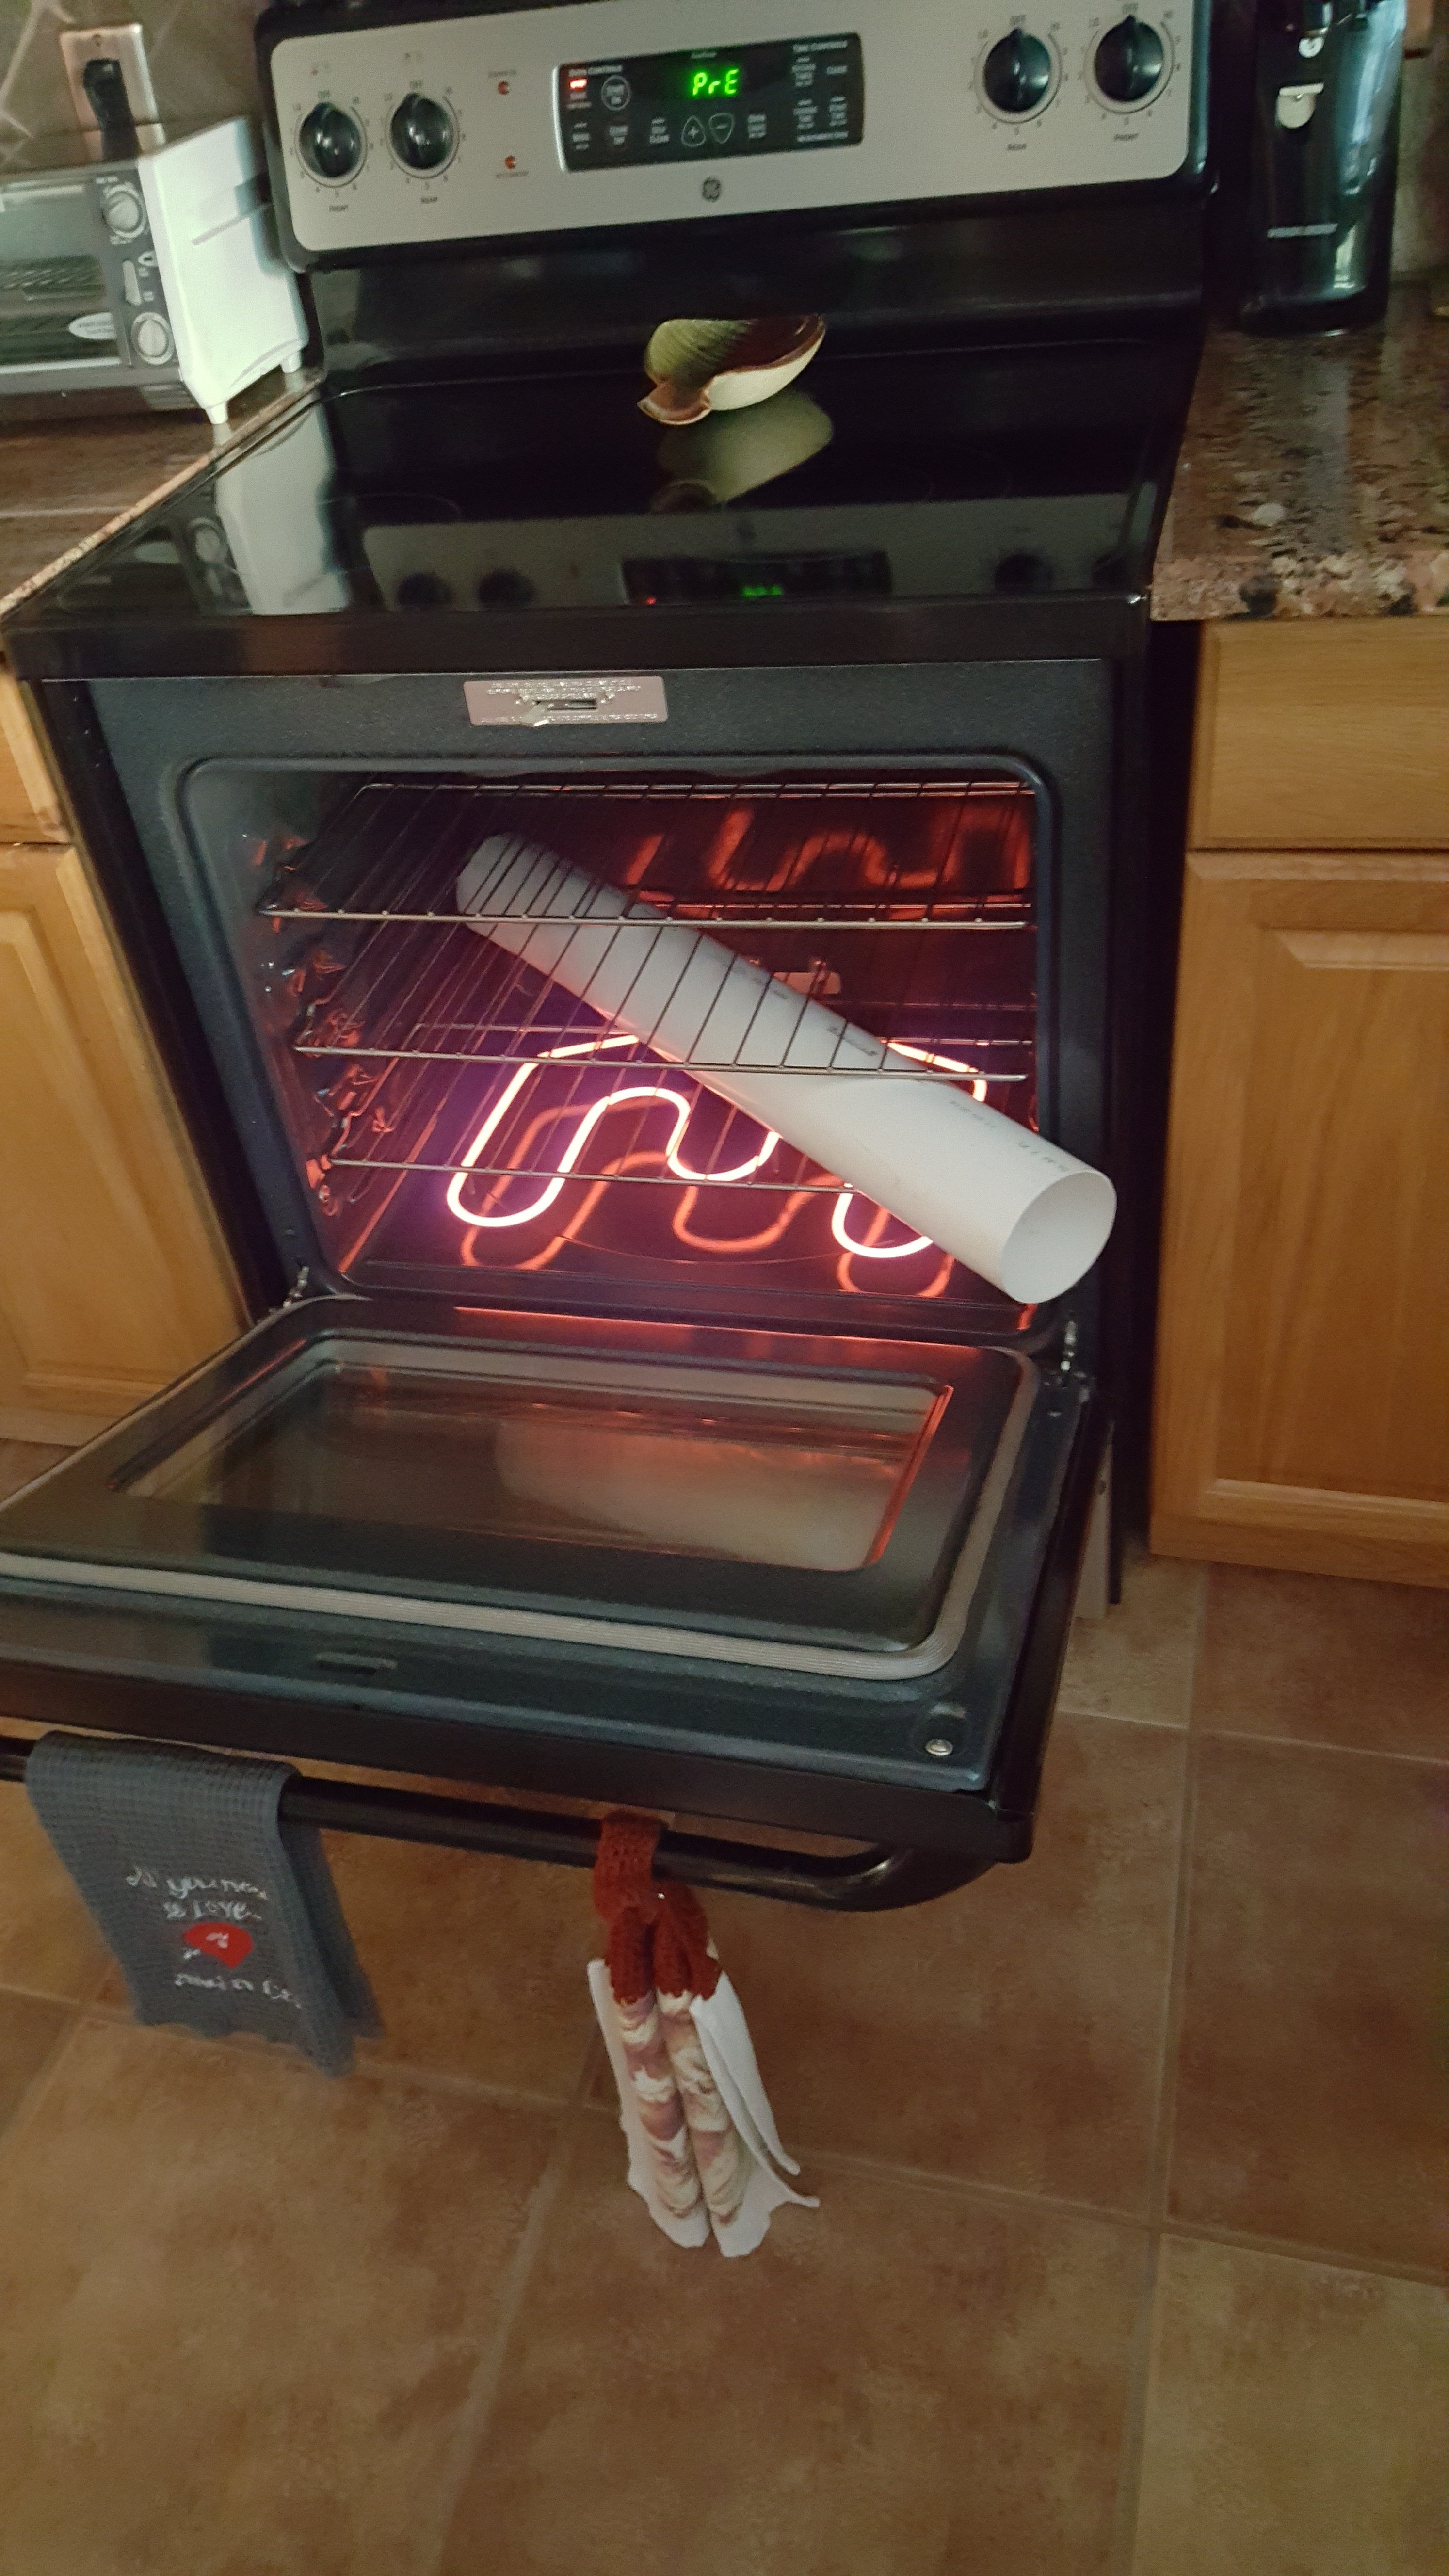 Heating PVC in oven |
Plan C 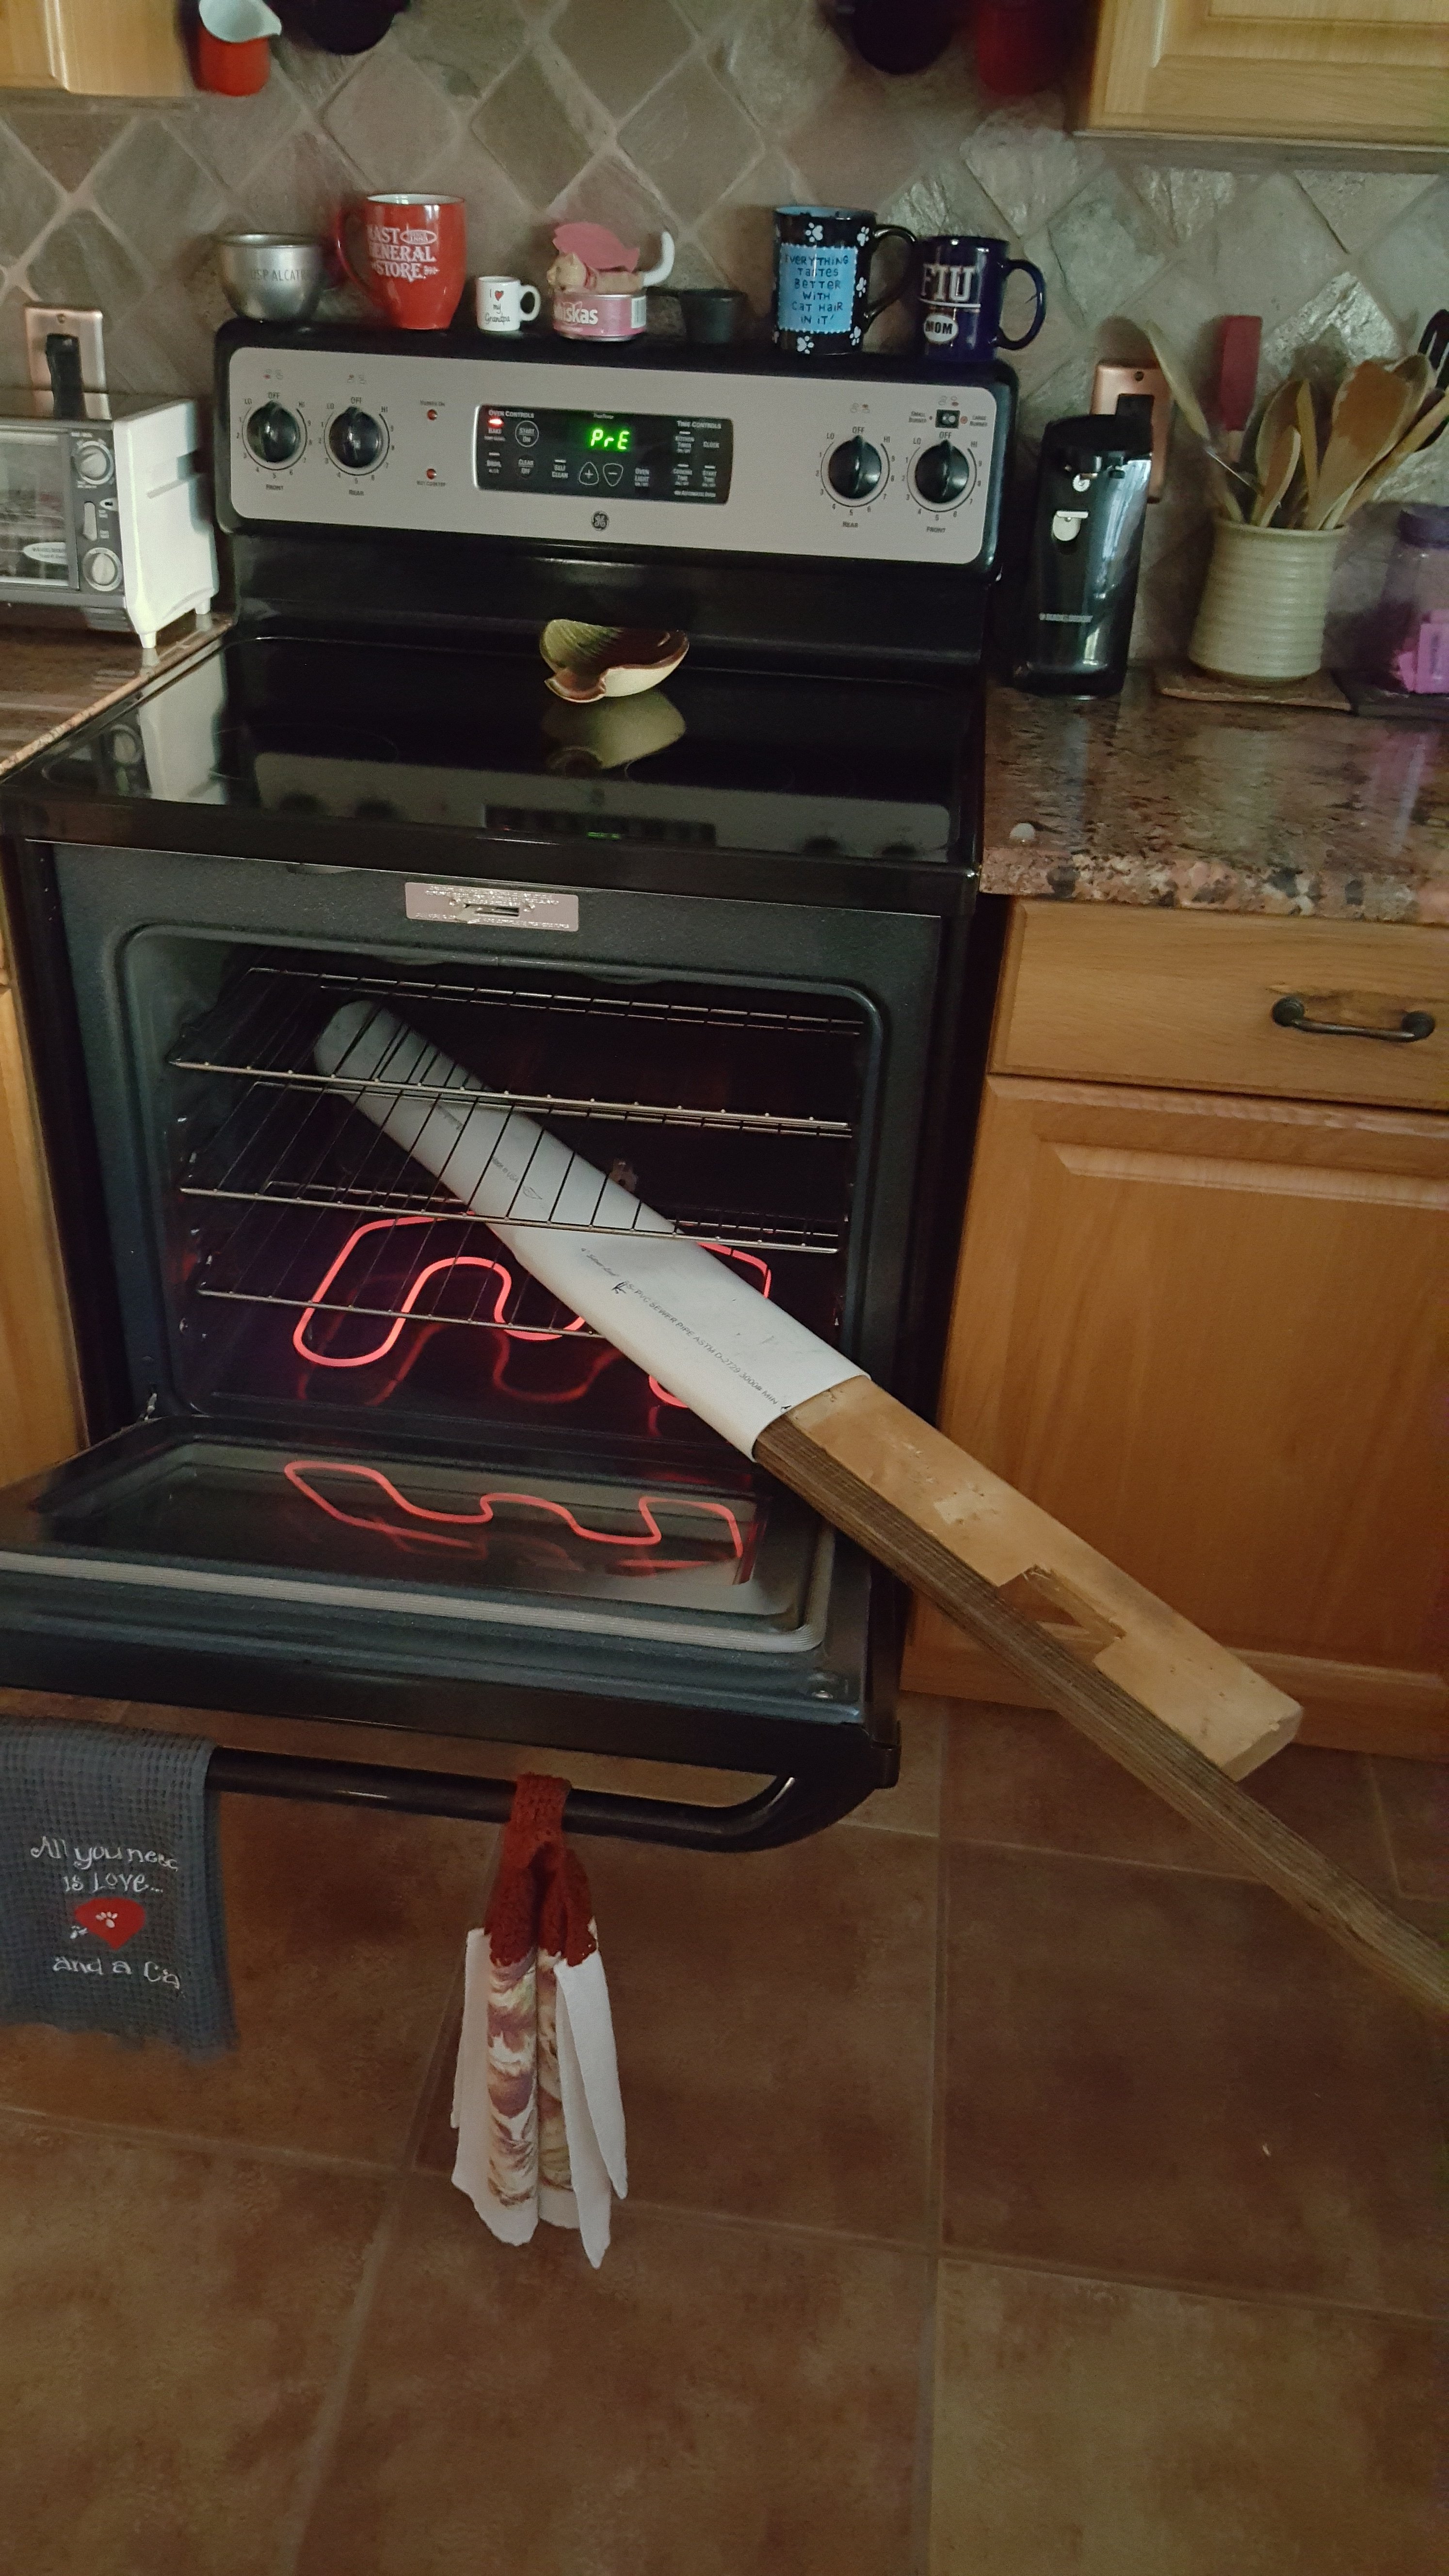 PVC partially reformed |
Plan C  PVC fully reformed |
||||||
|
2019-02-24 video #1 |
2019-02-24 video #2 |
|
|
||||||
|
2019-02-28 video #1 |
Dang It! First the spot welder needs its contact arms removed and the tips touched up. Then the band saw blade broke! |
Not only did the blade break, but the blade also bent a blade guide bracket! (I had to fix that before using the saw.) |
2019-02-28 video #2 |
||||||
|
2019-03-11 video #1 |
2019-03-11 video #2 |
2019-03-11 video #3 |
|
||||||
|
2019-03-16 video #1 |
2019-03-16 video #2 |
|
|
||||||
|
The end of the 3rd Step leaves the Dodge Grand Caravan with:
|
|||||||||
|
|||||||||


|
The 4th Step will be starting work on the wood mock-up body wagon panels to go on the 2005 Dodge Grand Caravan :
|
|||
|
2019-03-27 video #1 |
Starting the wood mock-up wagon panels, right rear first - the small rear fender flare had to be cut off before proceeding with fitting and adjusting the panel. |
2019-03-27 video #2 |
I found that I could glue back on part of what had been cut off - a top piece will be needed after more fitting and adjusting is done. Which means, instead of watching paint dry, it was watching glue dry. |
|
2019-04-02 video #1 |
2019-04-02 video #2 |
I have completed the wagon side and rear panel wood mock-up panels to the extent that they can be addressed prior to the Dodge Grand Caravan body being set on the Ford Explorer chassis. |
The main design issues were addressing covering the sliding door rolling hinge track and opening the sliding door without interference from the panels to each other or the body structure - mission accomplished. |
|
( ... now back to finishing the touchs up on the body ... ) |
|||
|
2019-04-07 video #1 |
2019-04-07 video #2 |
|
|
|
2019-05-13 photo #1 |
2019-05-13 photo #2 |
2019-05-13 photo #3 |
2019-05-13 video #4 |
|
(After 3 months of very little time for work on the project, very little progress was made on it ... ... I'm now finally able to do some work on it again.) |
|||
|
2019-08-04 video #1 |
(The next day, the camera fell and stopped working; missed a day of videos; camera working again; but only on batteries; DC adapter power inside camera not working.) |
2019-08-06 video #2 |
2019-08-06 video #3 |
|
2019-08-08 video #1 |
2019-08-08 video #2 |
|
|
|
2019-08-09 video #1 |
2019-08-09 video #2 |
|
|
|
2019-08-15 video #1 |
2019-08-15 video #2 |
|
|
|
2019-08-18 video #1 |
2019-08-18 video #2 |
|
|
|
09-20-2019 |
FIRE IN THE HOLE! UMMMmmm ... that was NOT a 'good thing' ... that was a near disaster! |
||
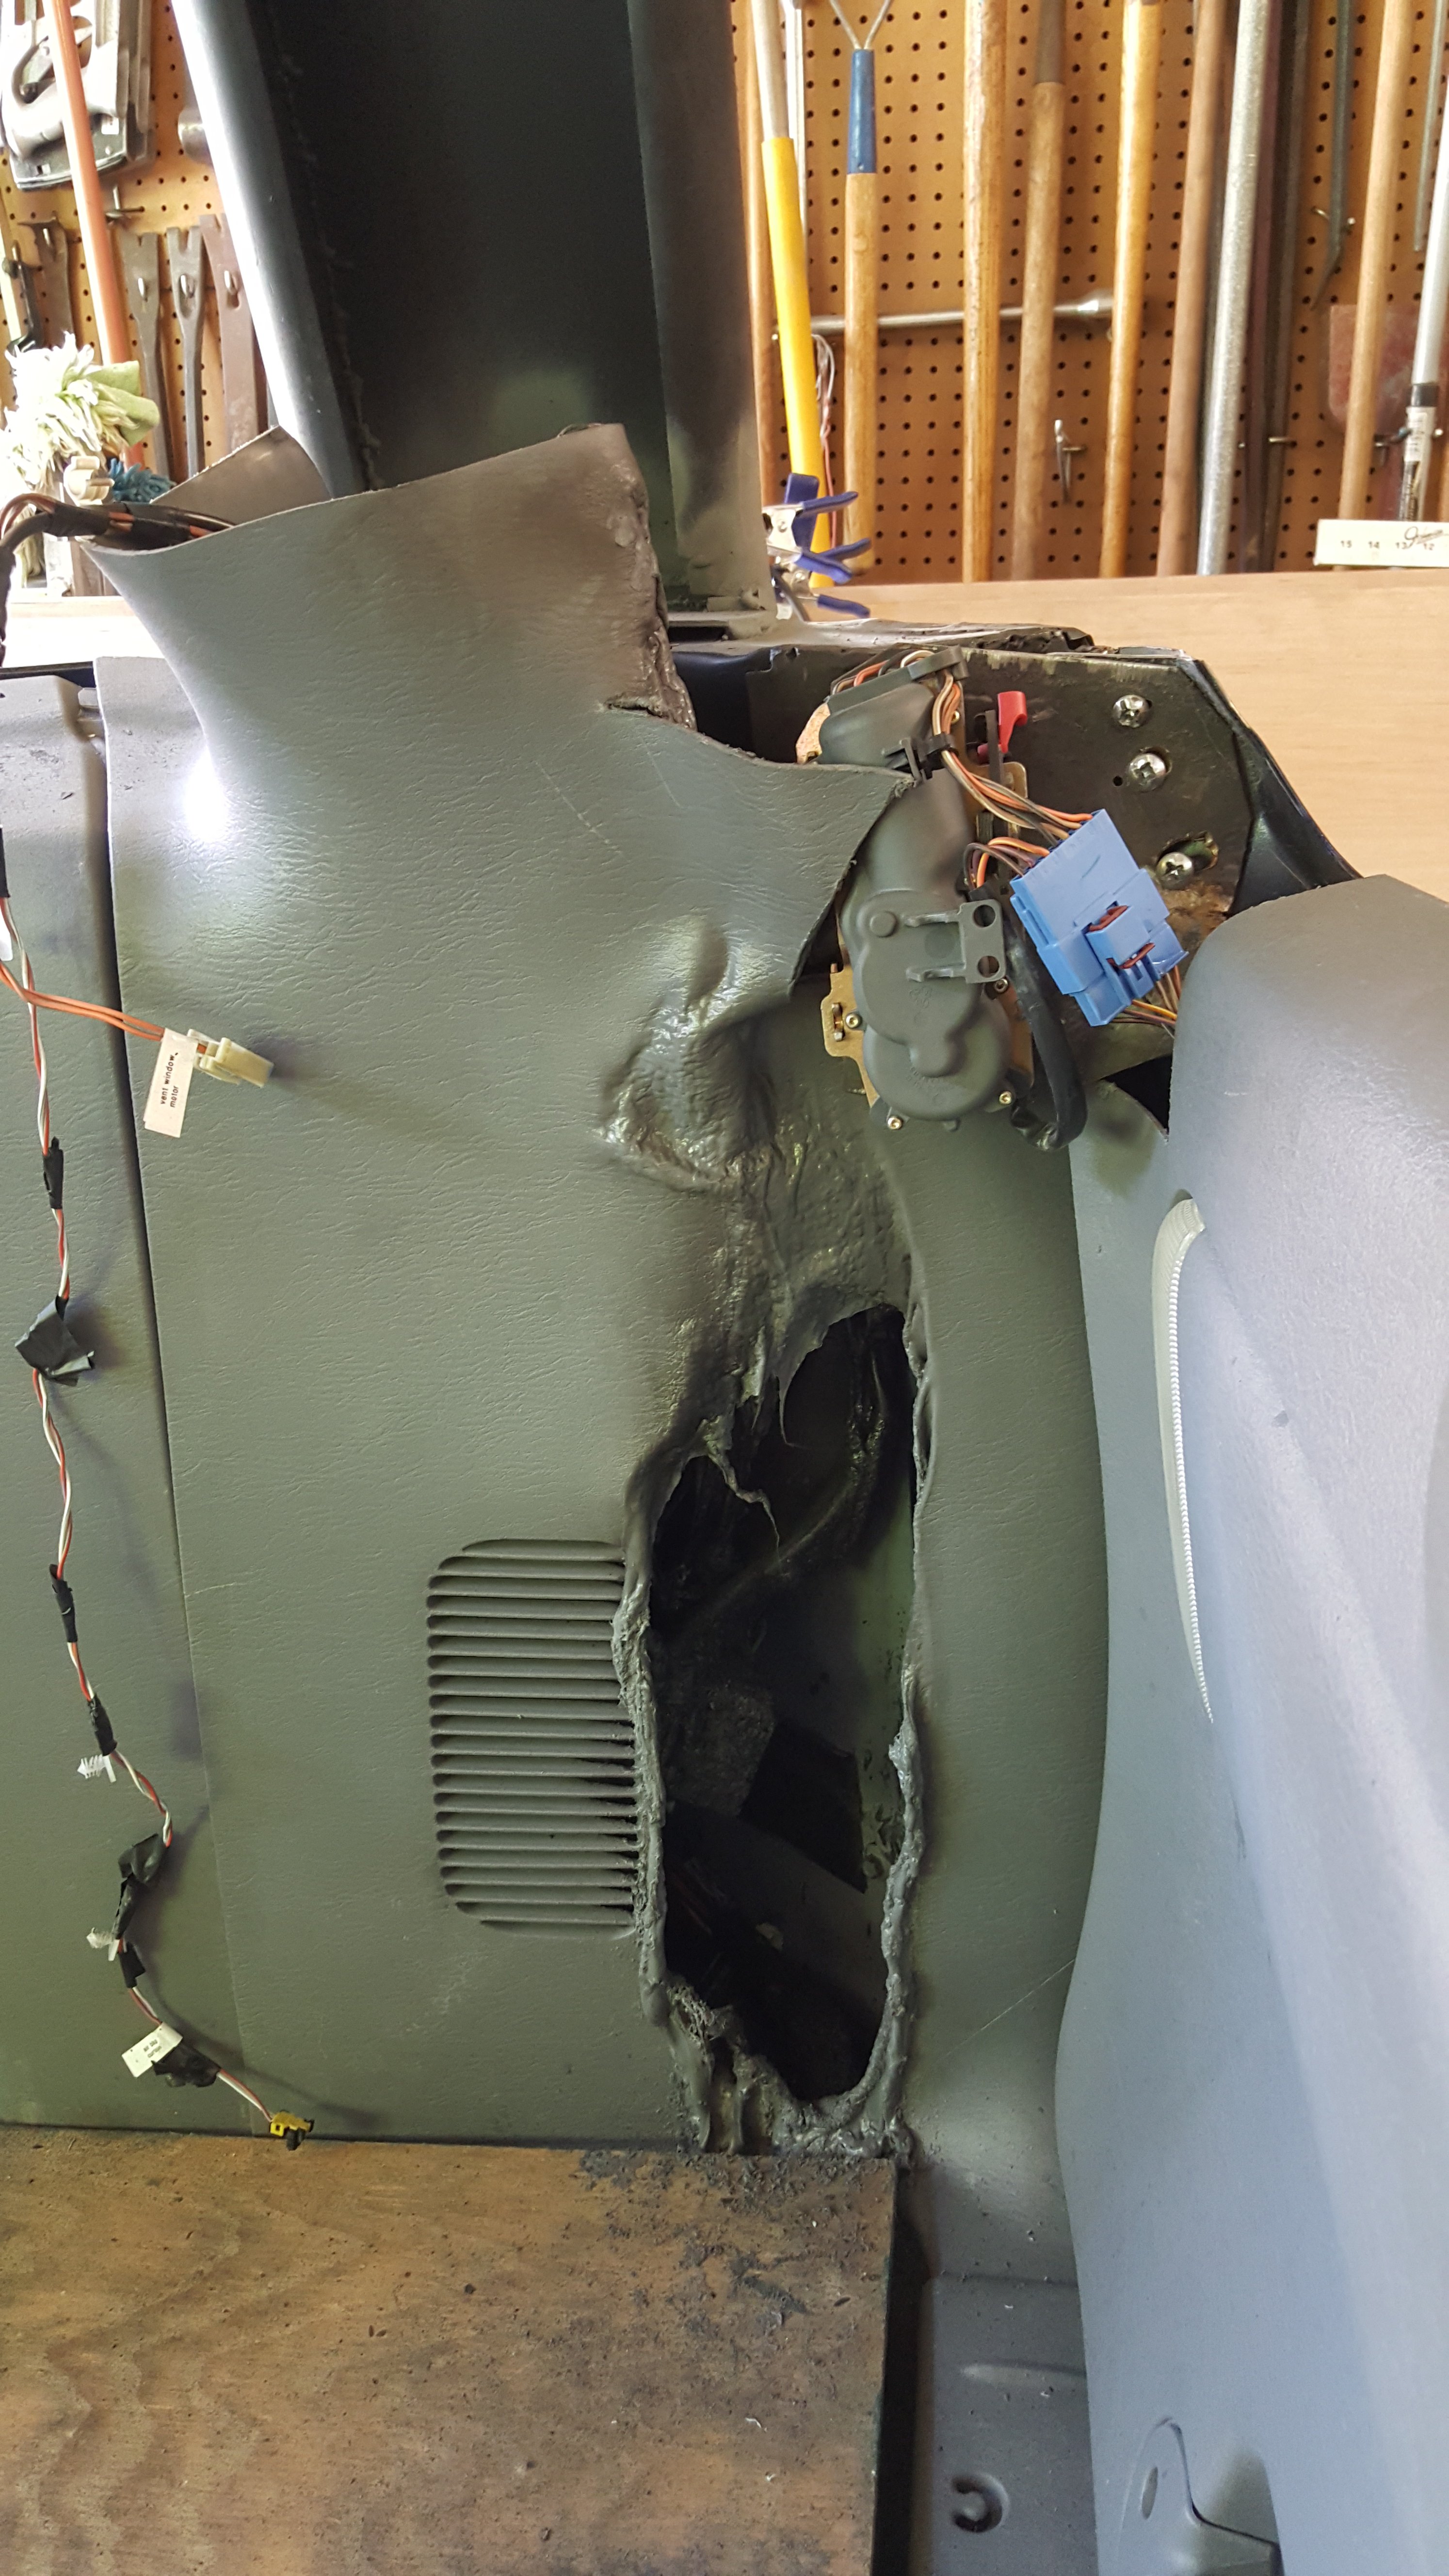
The leather I used for welding protection slipped, allowing welding spatter to catch the plastic interior trim, and the rear heat/air conditioning unit, on fire. |
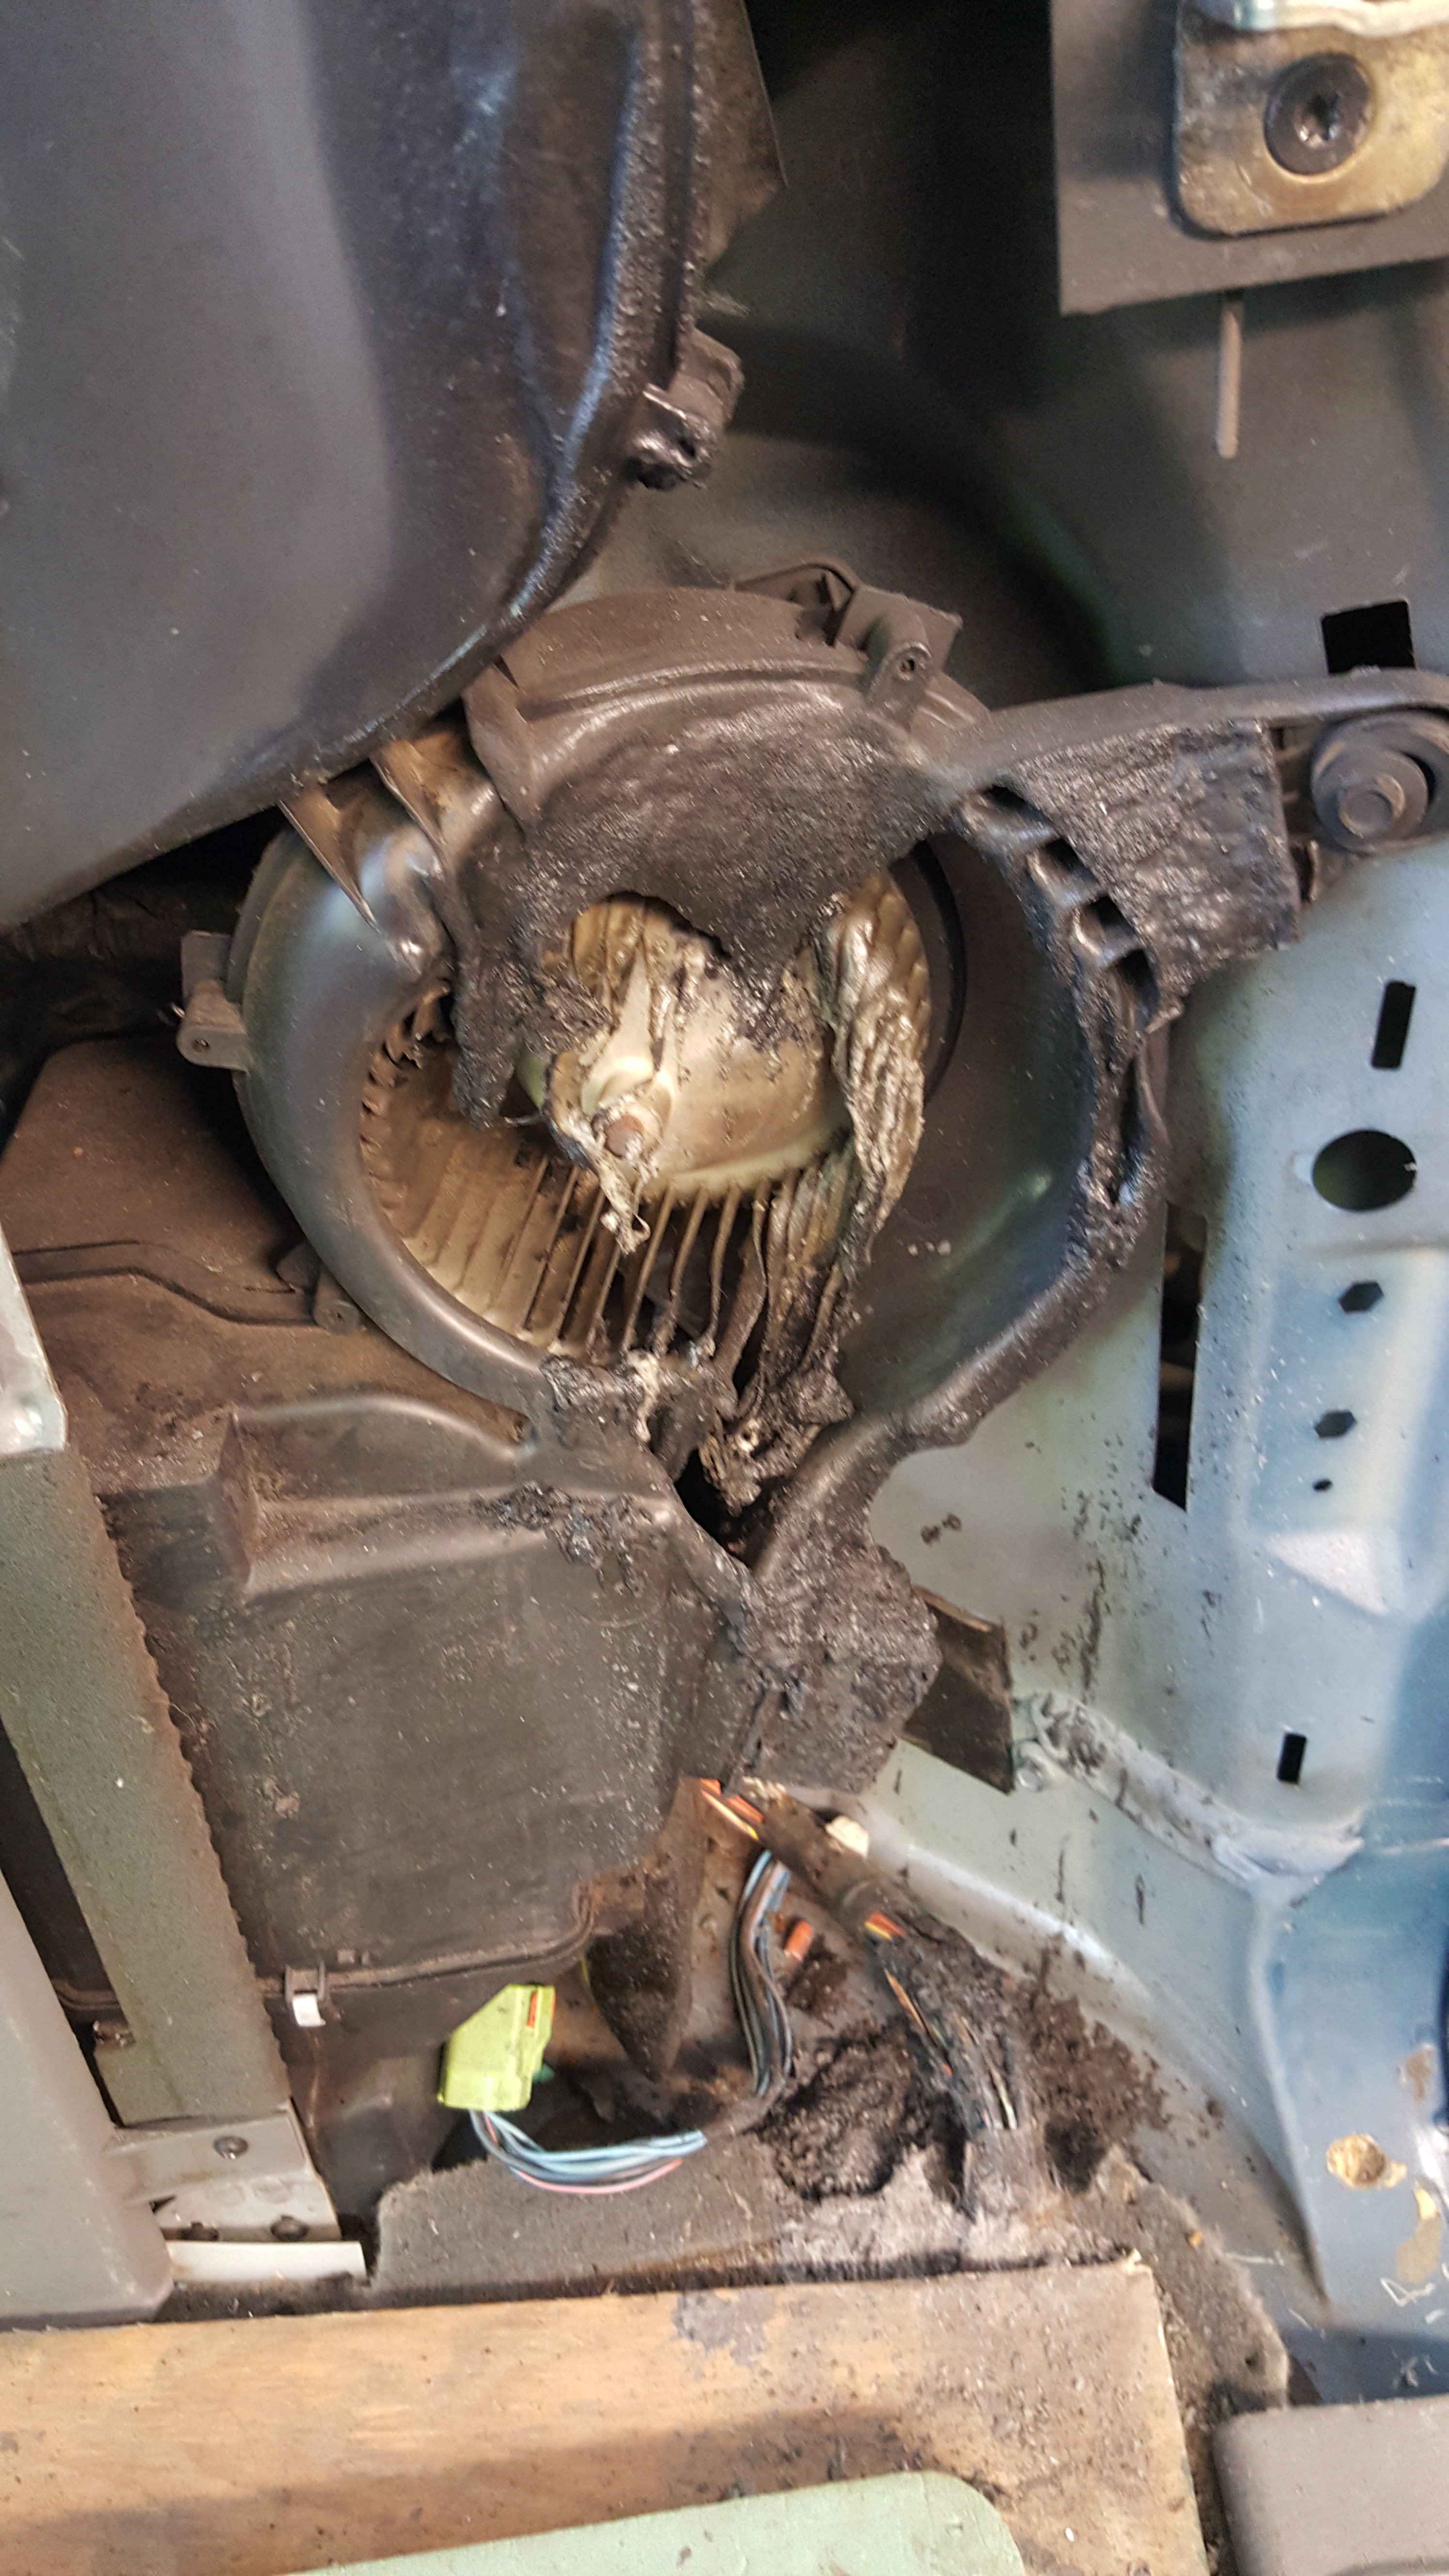
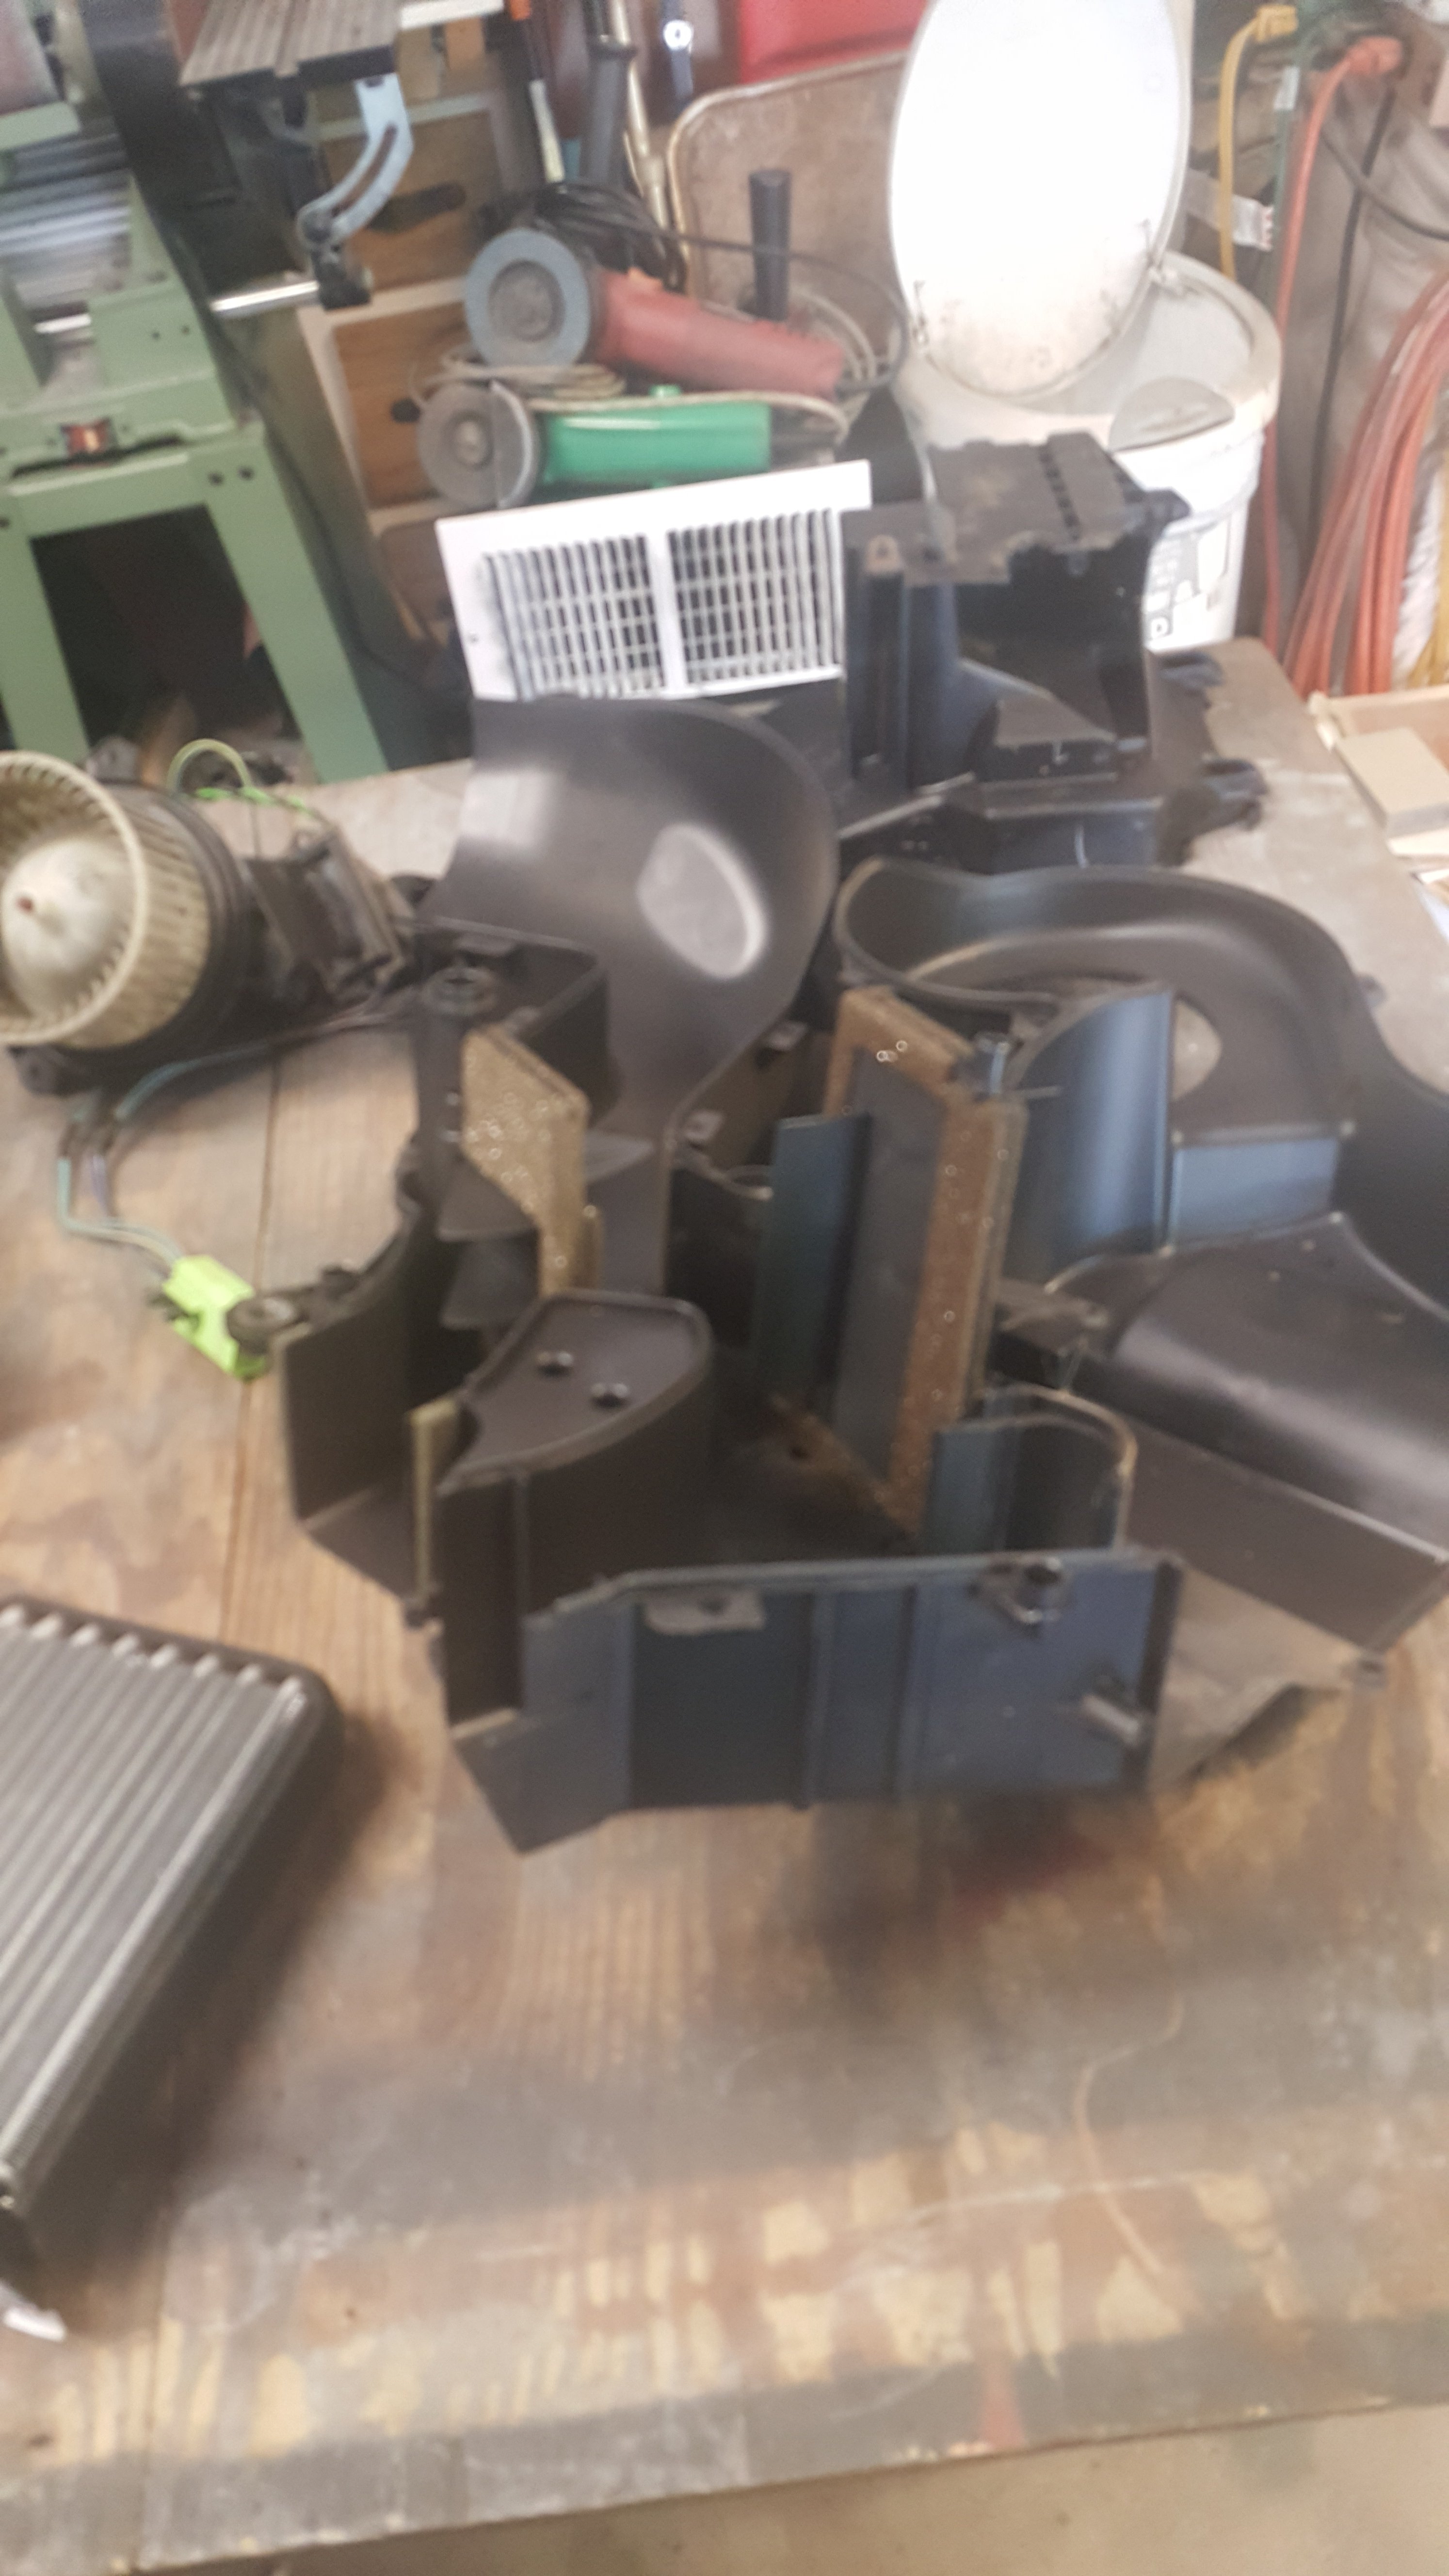
This is the burned and melted housing, the blower wheel also caught on fire and melted. |
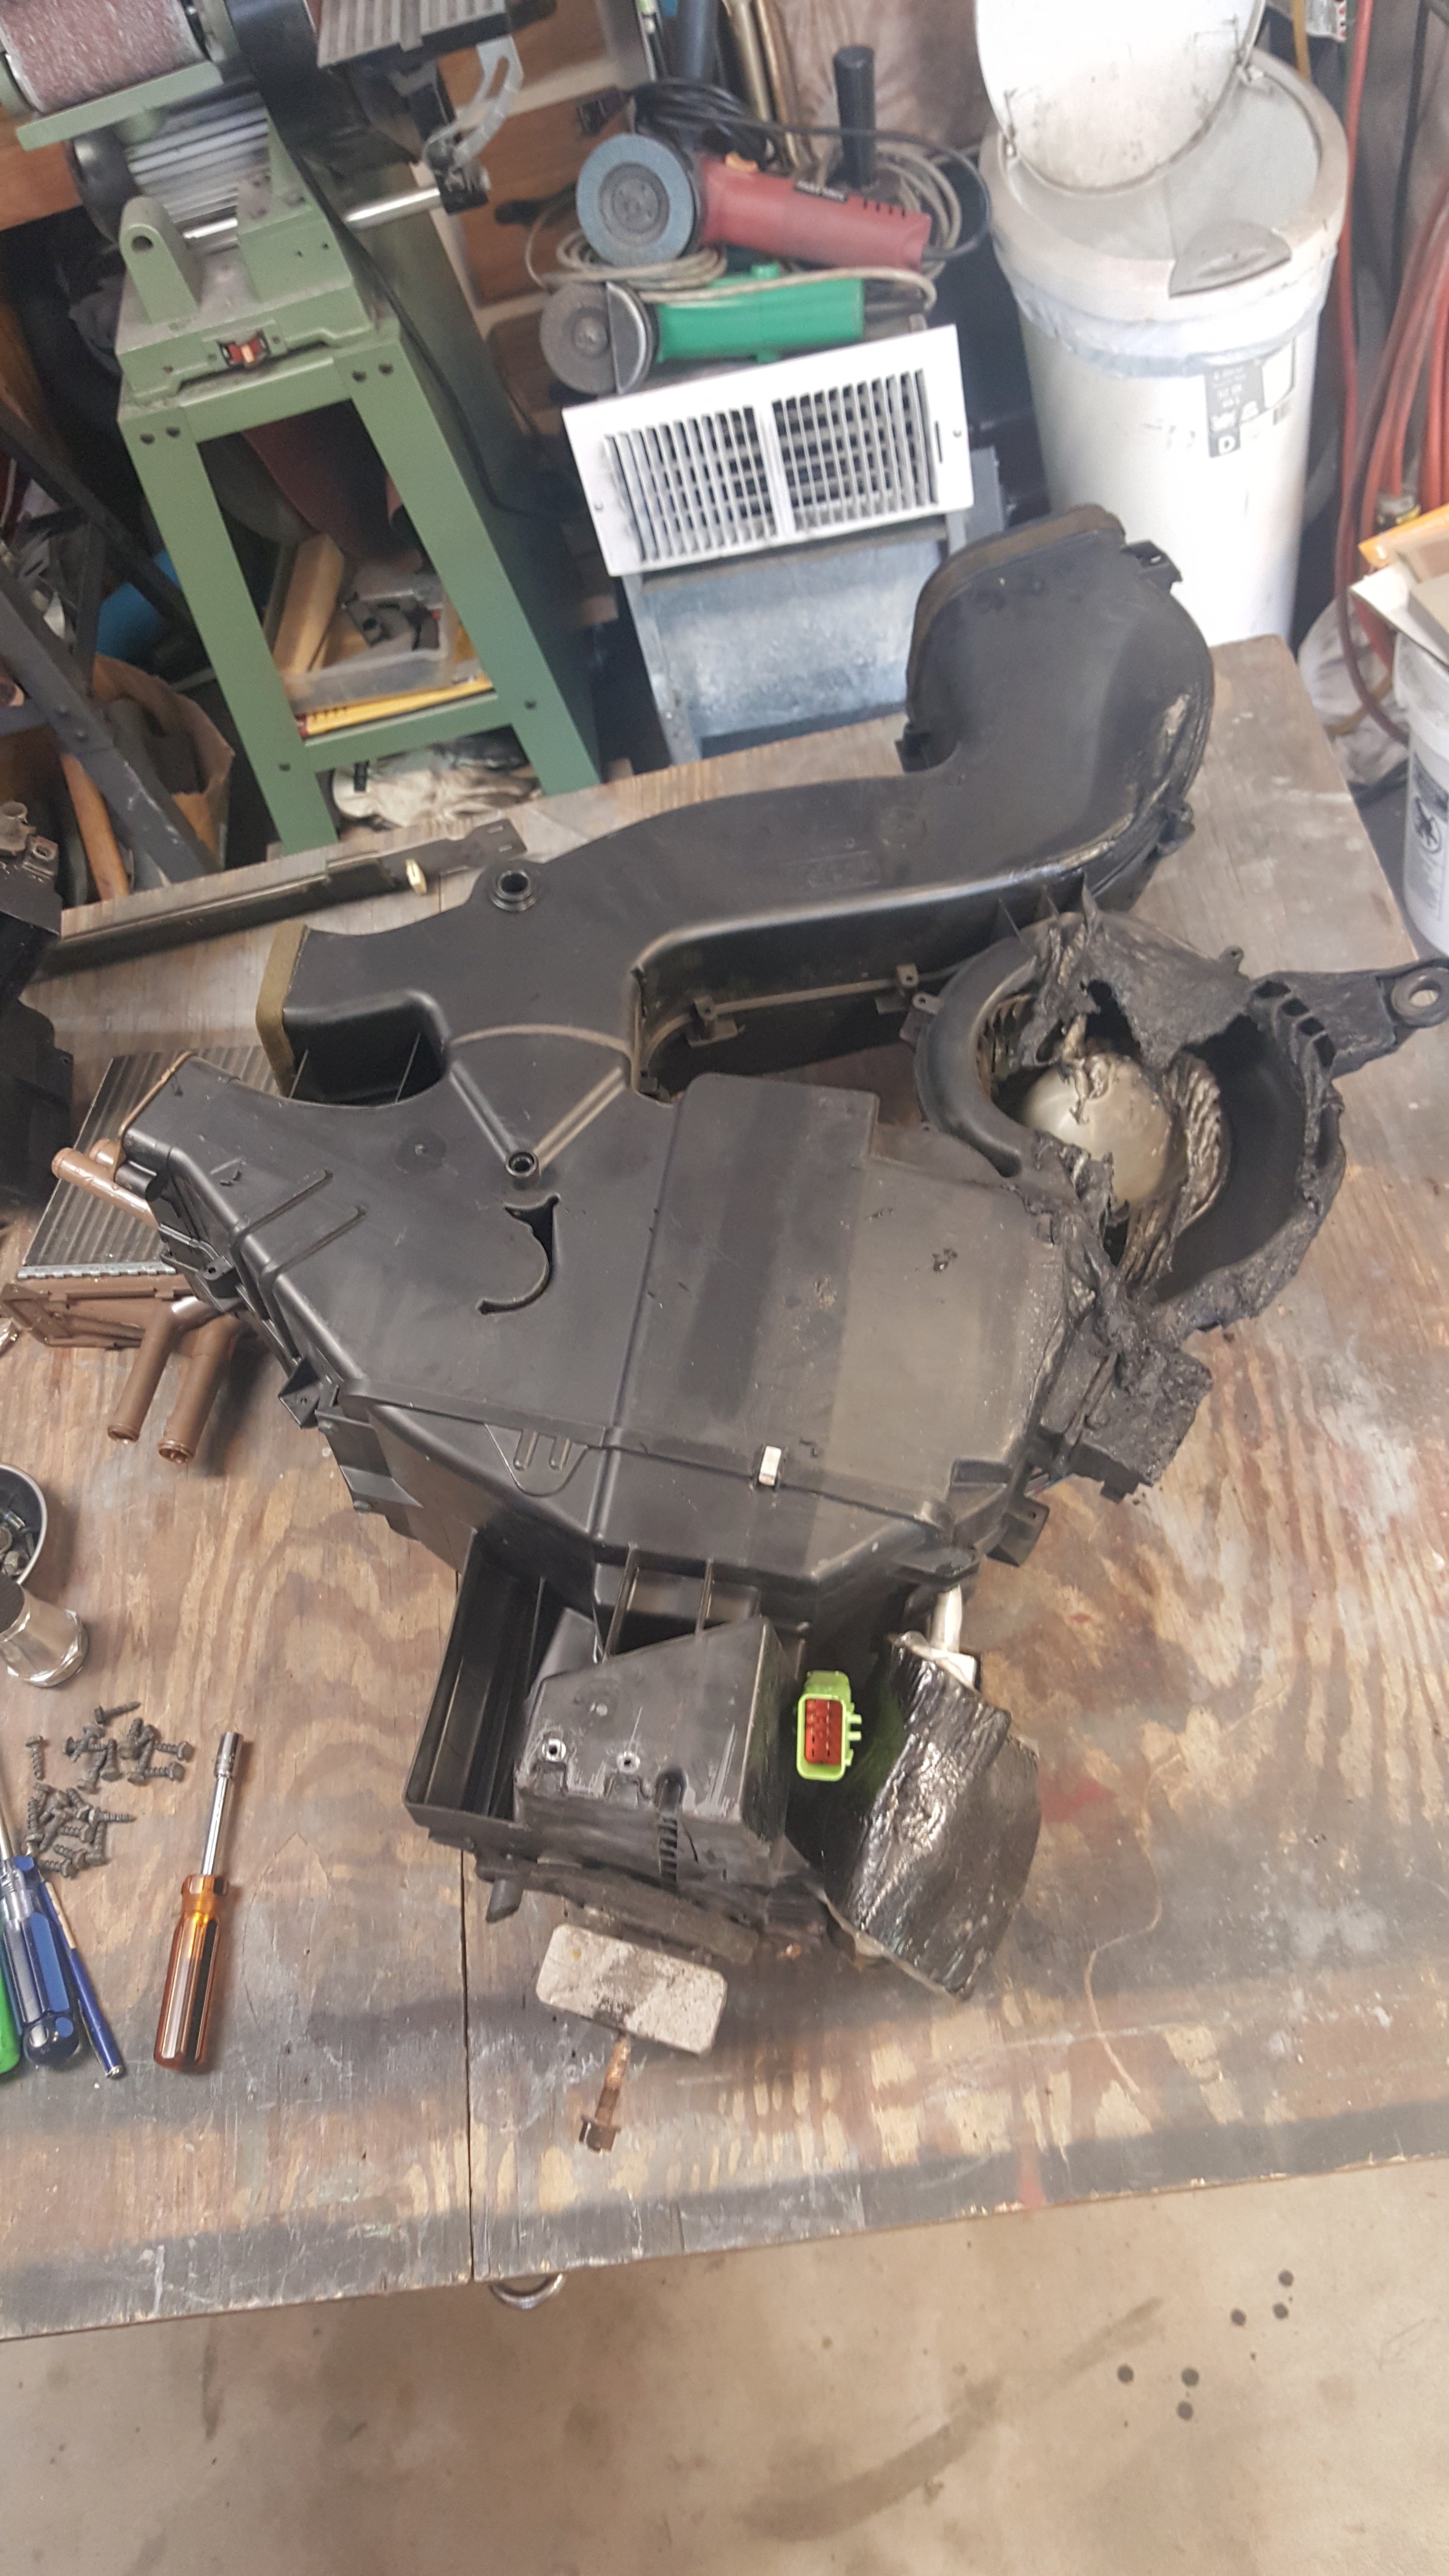
Rear heat/air conditioning unit has been removed while the damage was confined to the area shown, the entire unit needs to be replaced. |
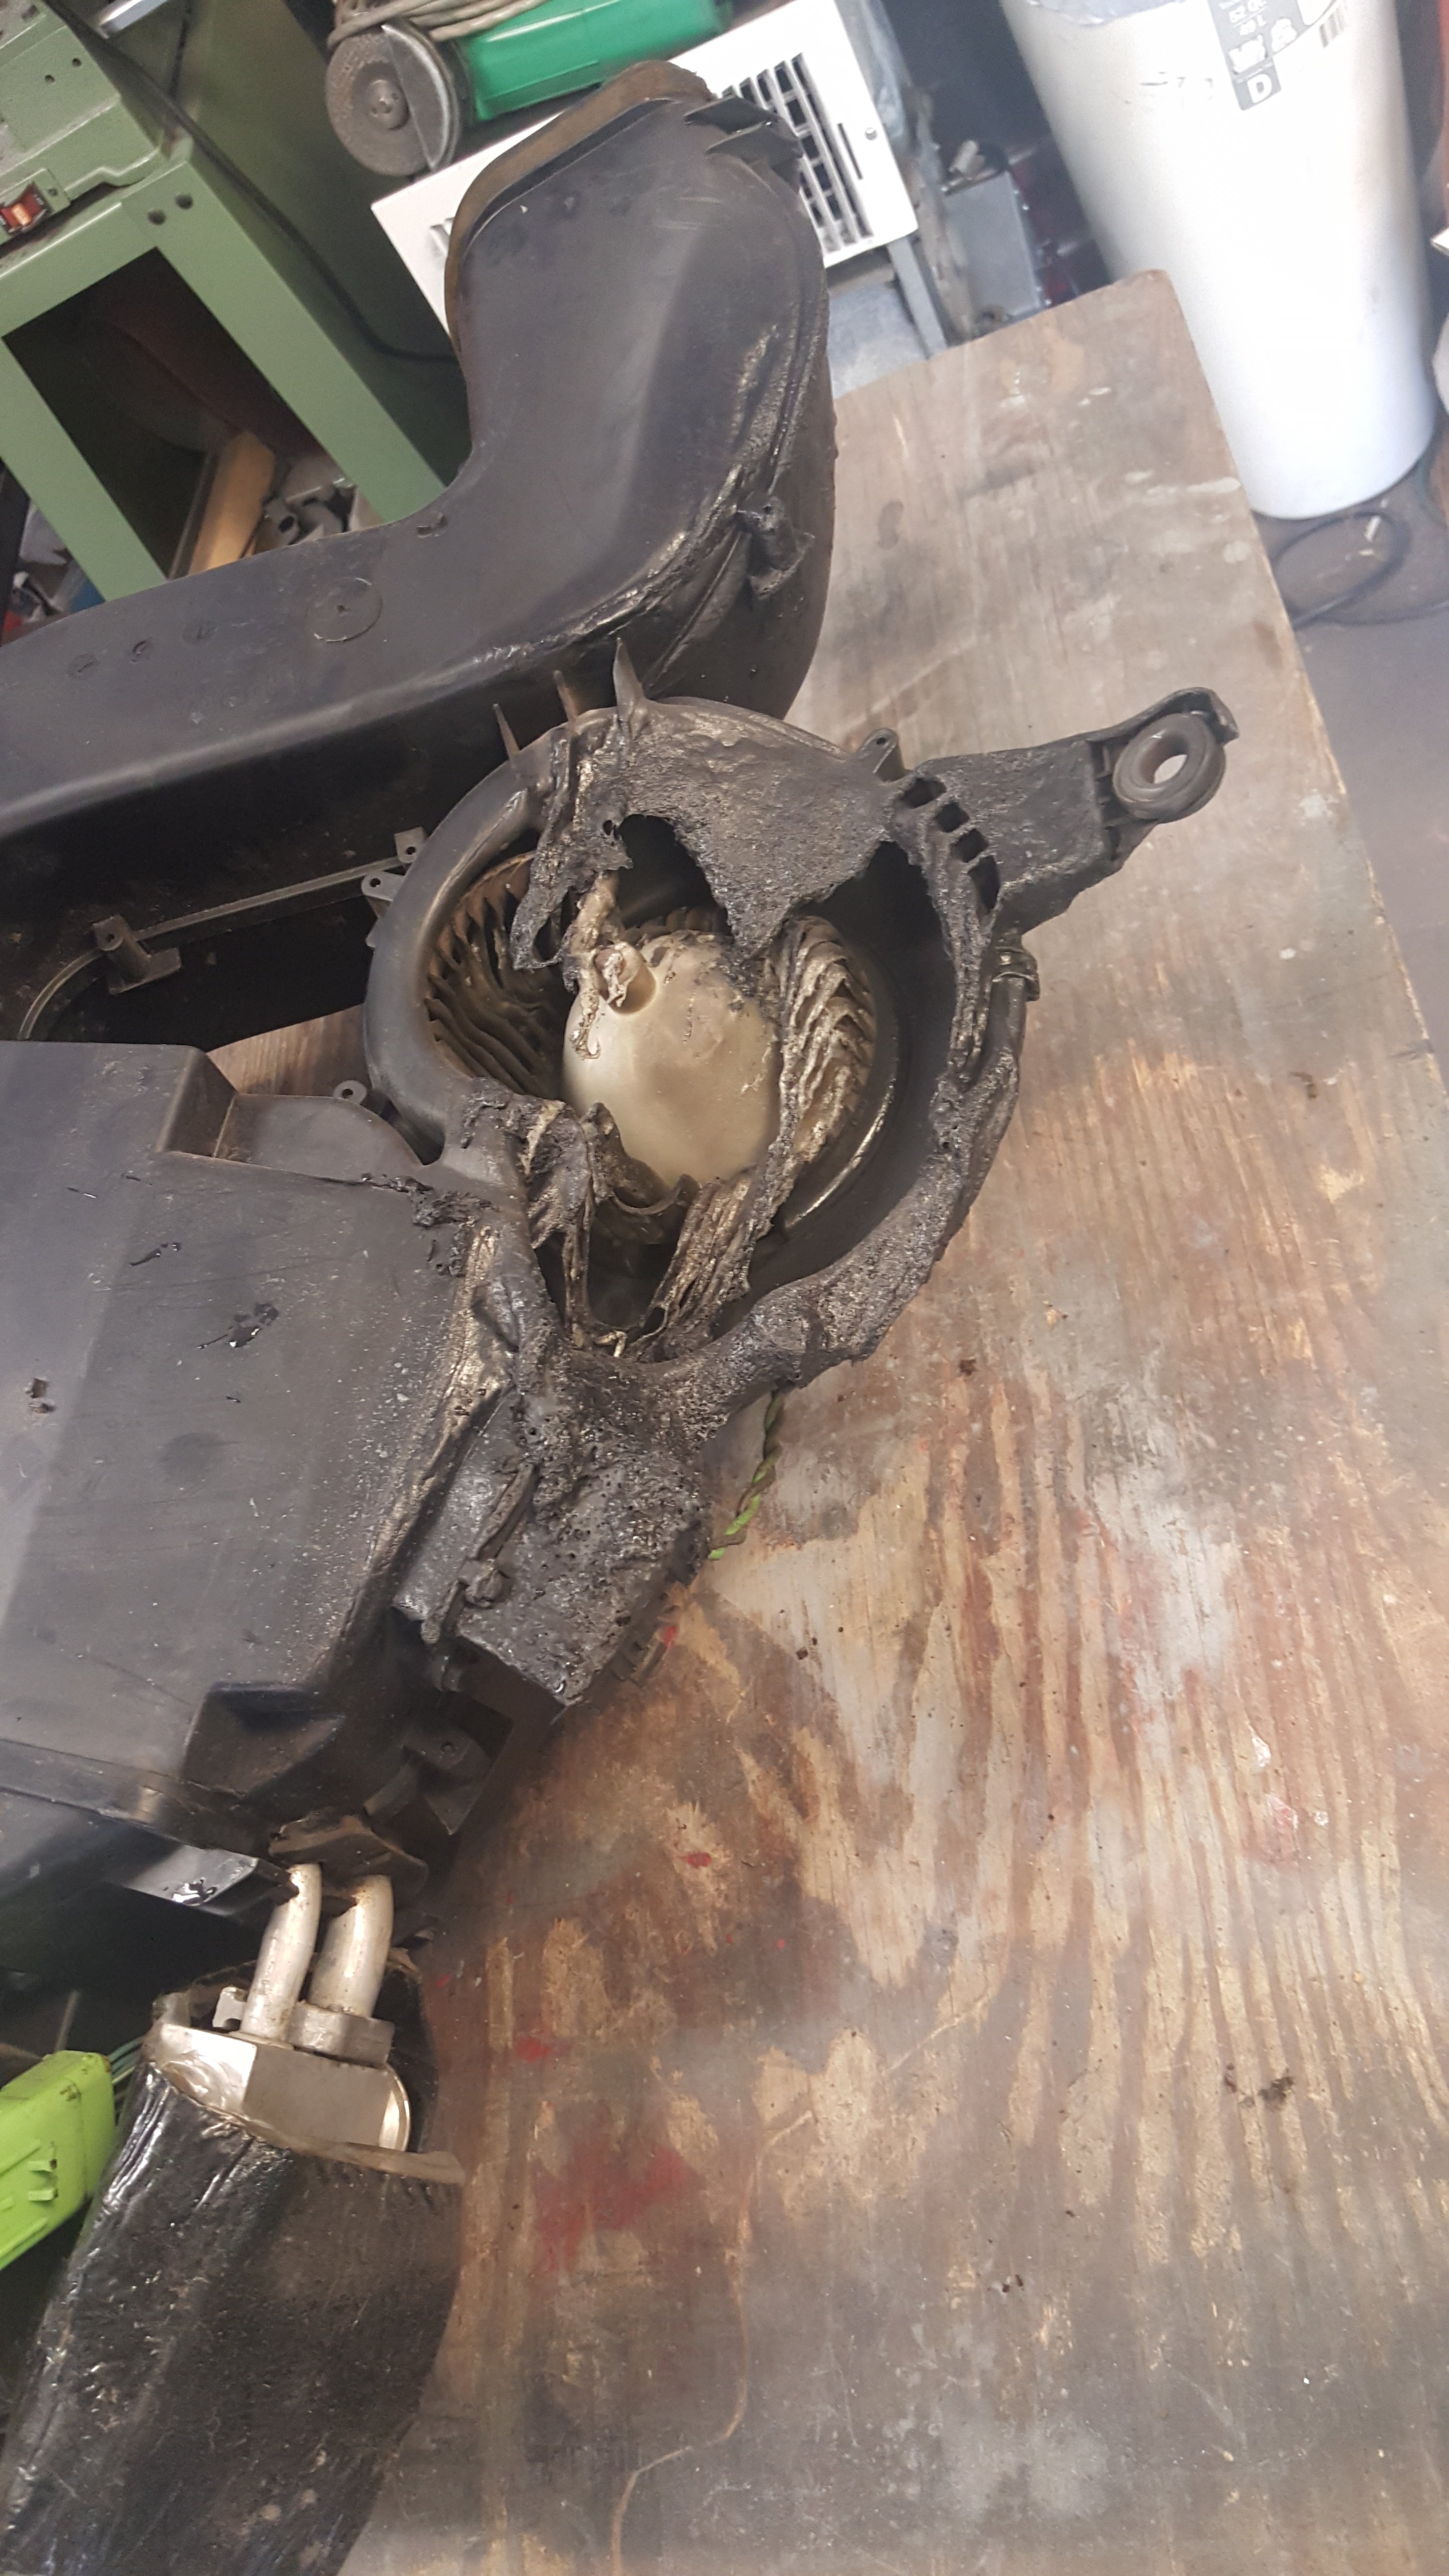
Closer view of melted blower and blower squirrel cage fan. |

The interior trim piece which caught on fire and melted, burning through to the unit behind it. |
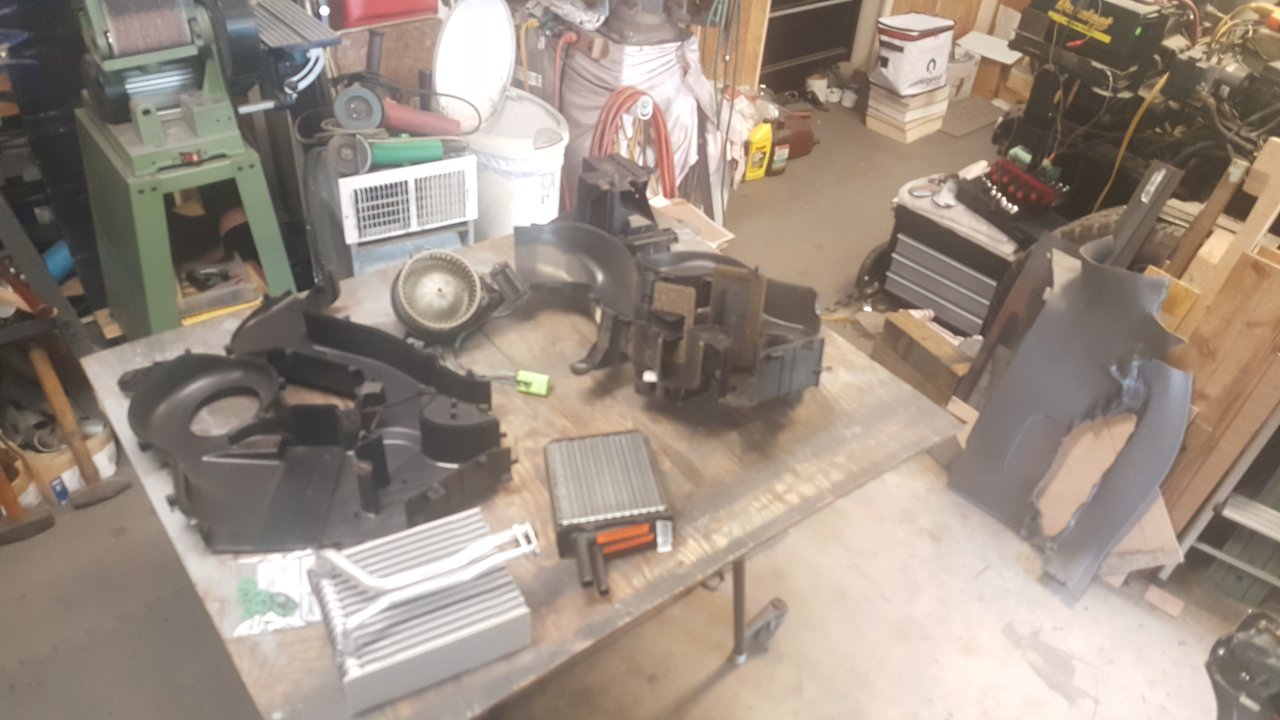
I found a replacement unit from a 2006 Dodge Grand Caravan in the local auto salvage yard - took the unit apart to begin rebuilding it (all I really needed was the two outside housing sections). |
Heater core, evaporator core, blower motor & blower squirrel cage fan removed. Fortunately, I could salvage the blower resistor from my unit as the blower resistor in the replacement unit didn't work with my wiring and control unit. |
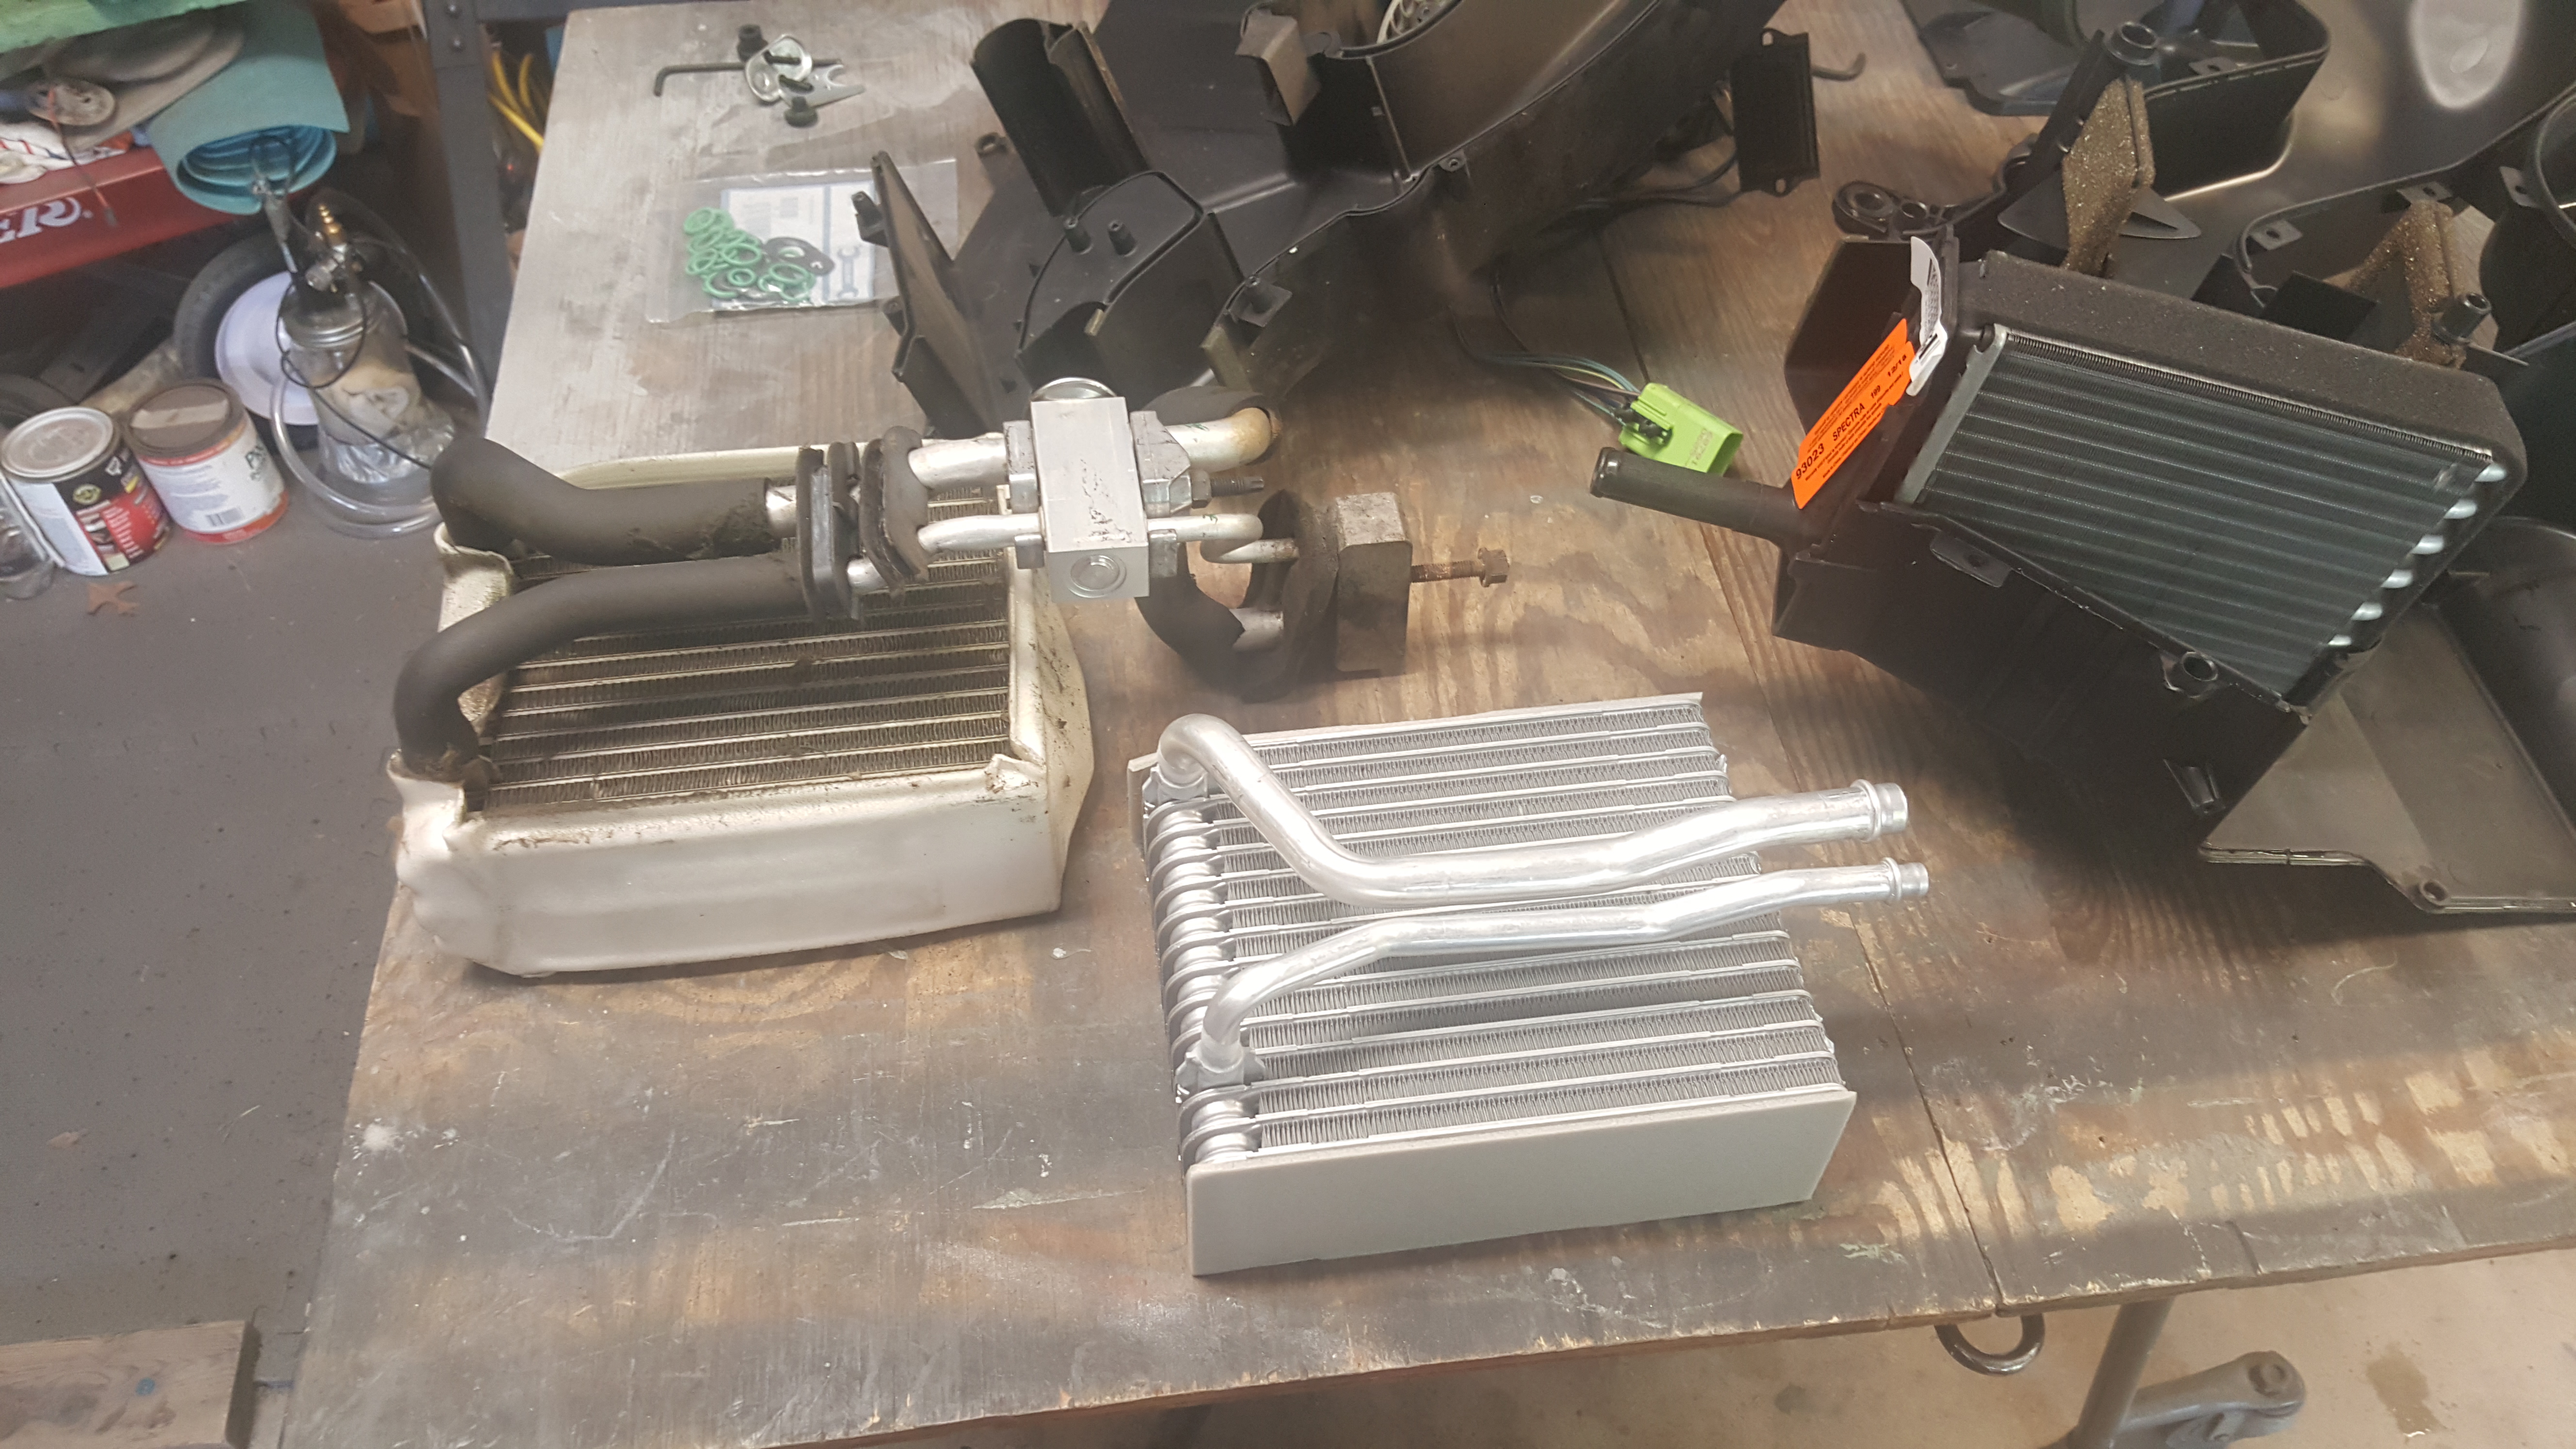
Replacing evaporator core with a new one, the old one (still good) is on the left and ready for parts to be moved to the new evaporator core in the foreground. |

Removing parts from old evaporator core to the new one. |

Removing parts from old evaporator core to the new one. |
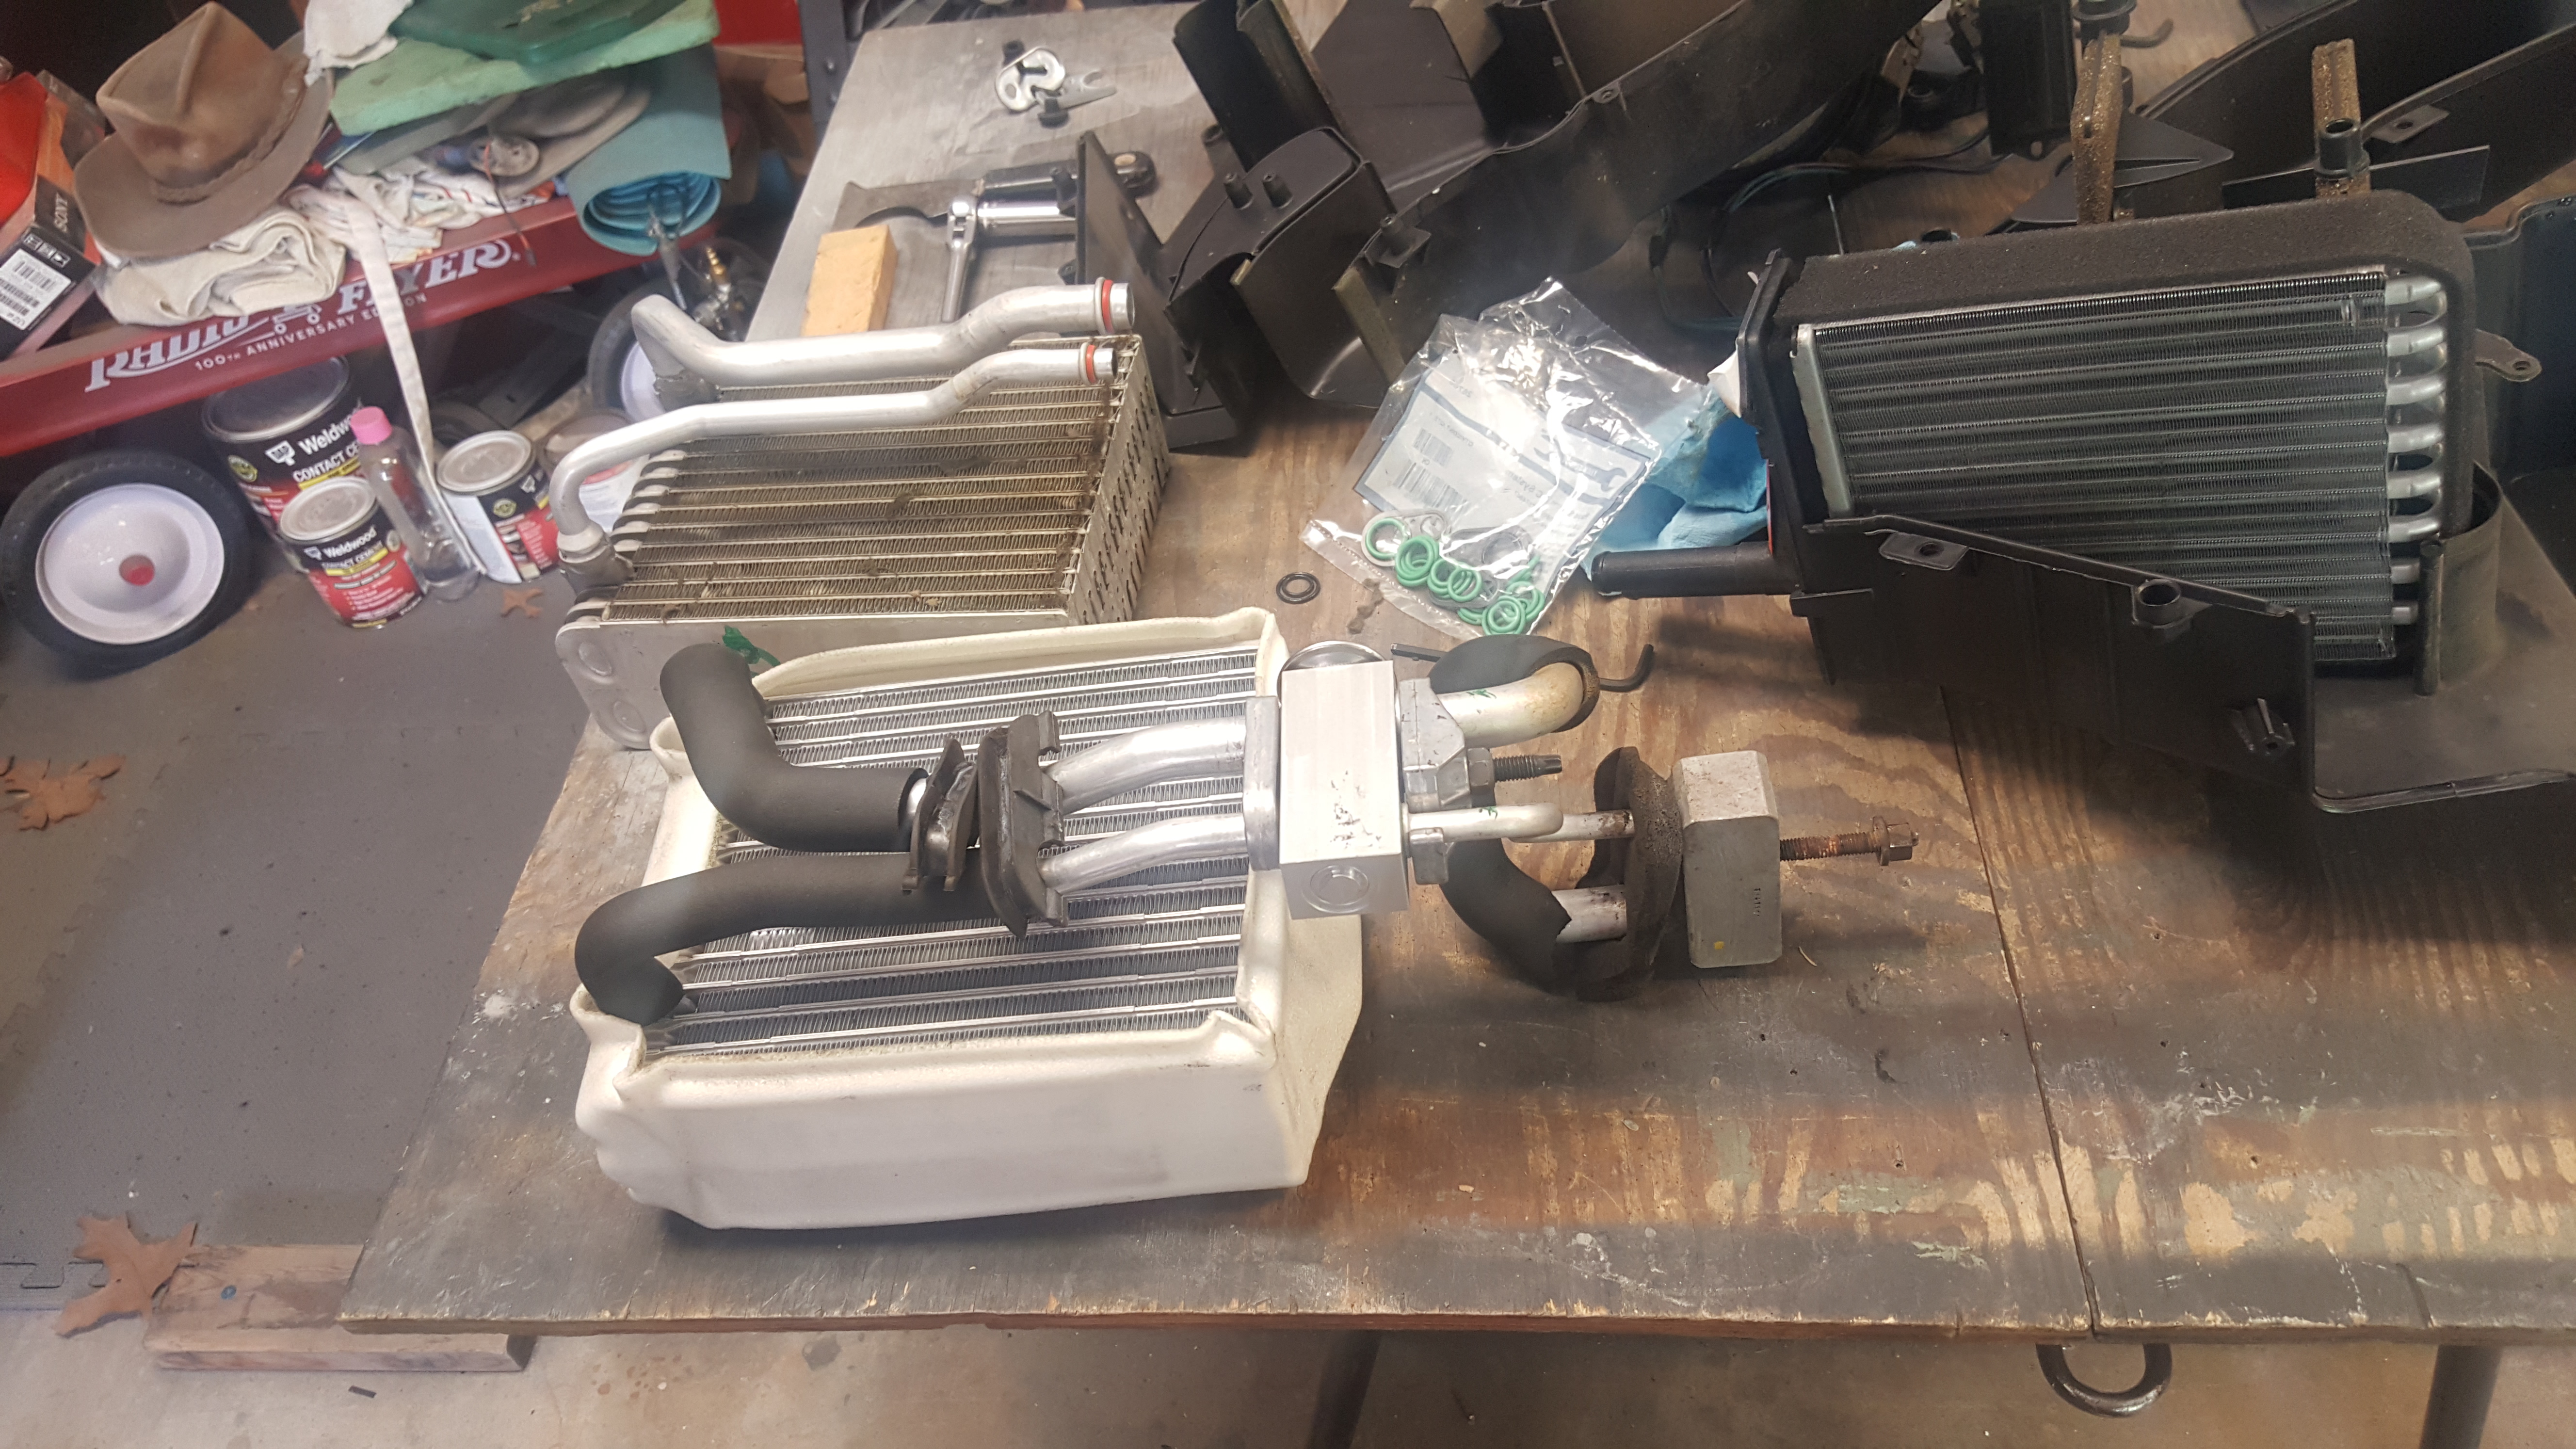
New evaporator core is ready for installation into the unit. |

New heater core is installed in the replacement housing. |
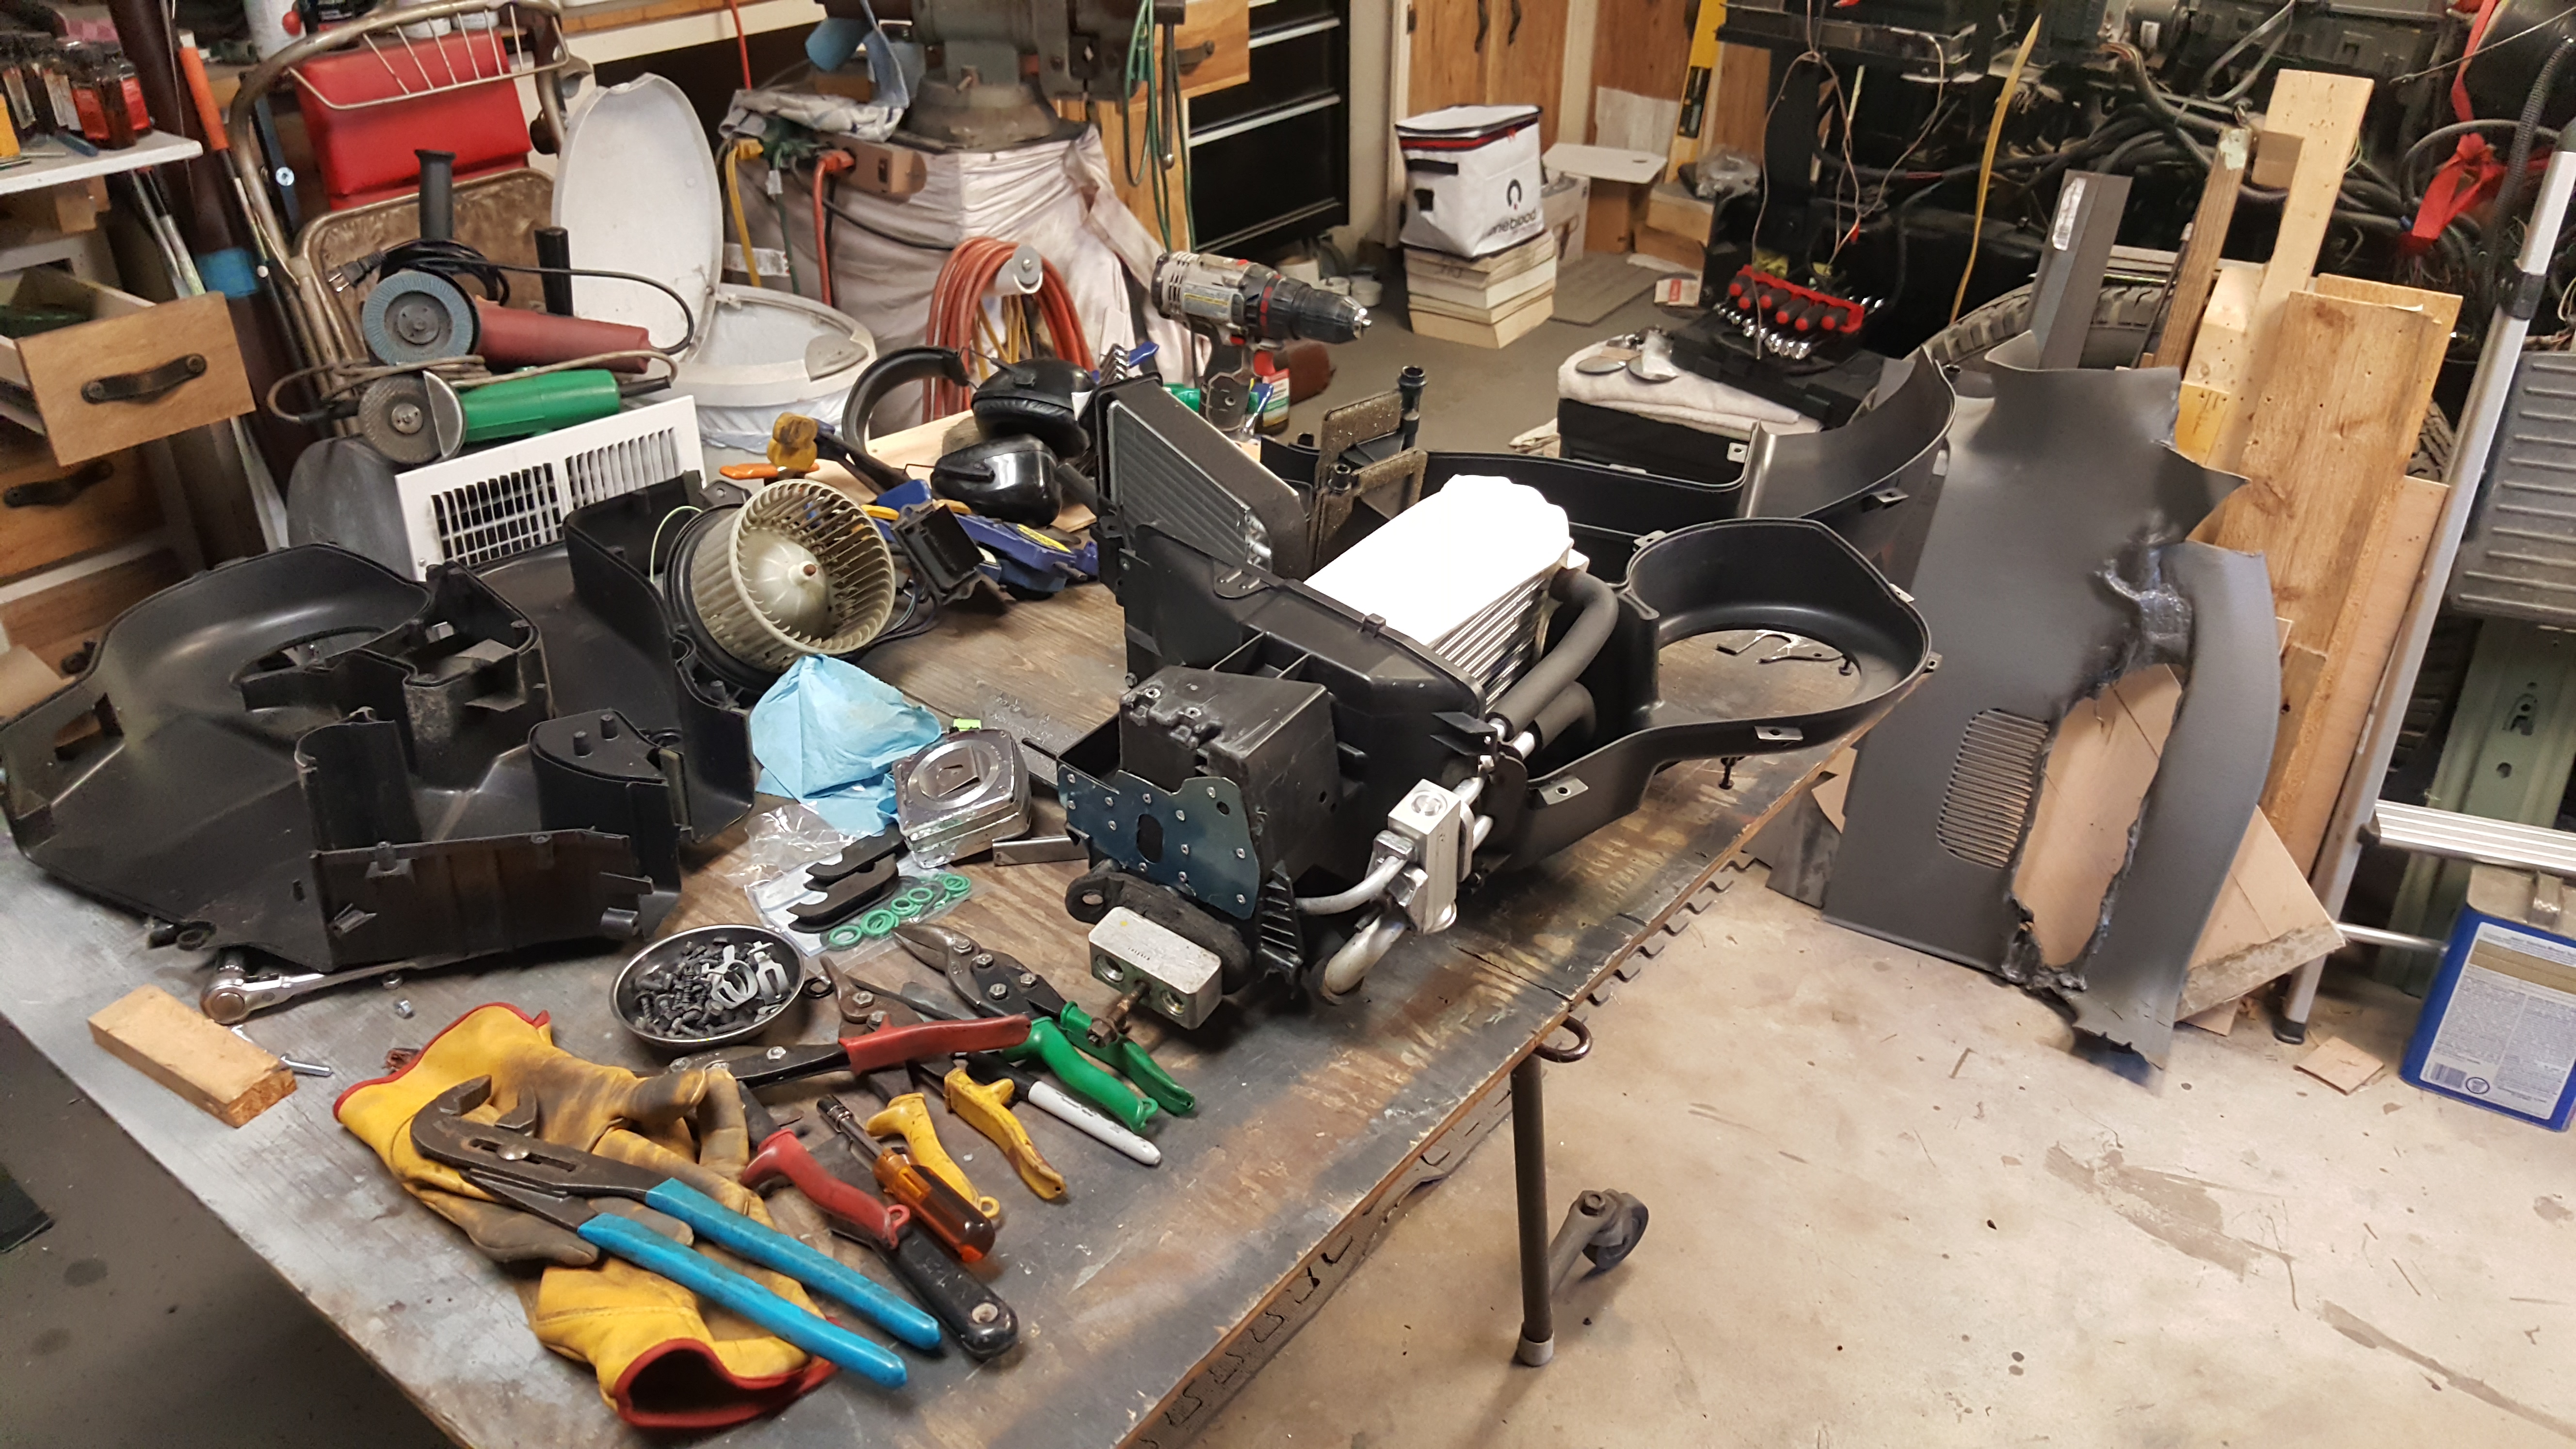
Working on putting parts into the replacement housing. |
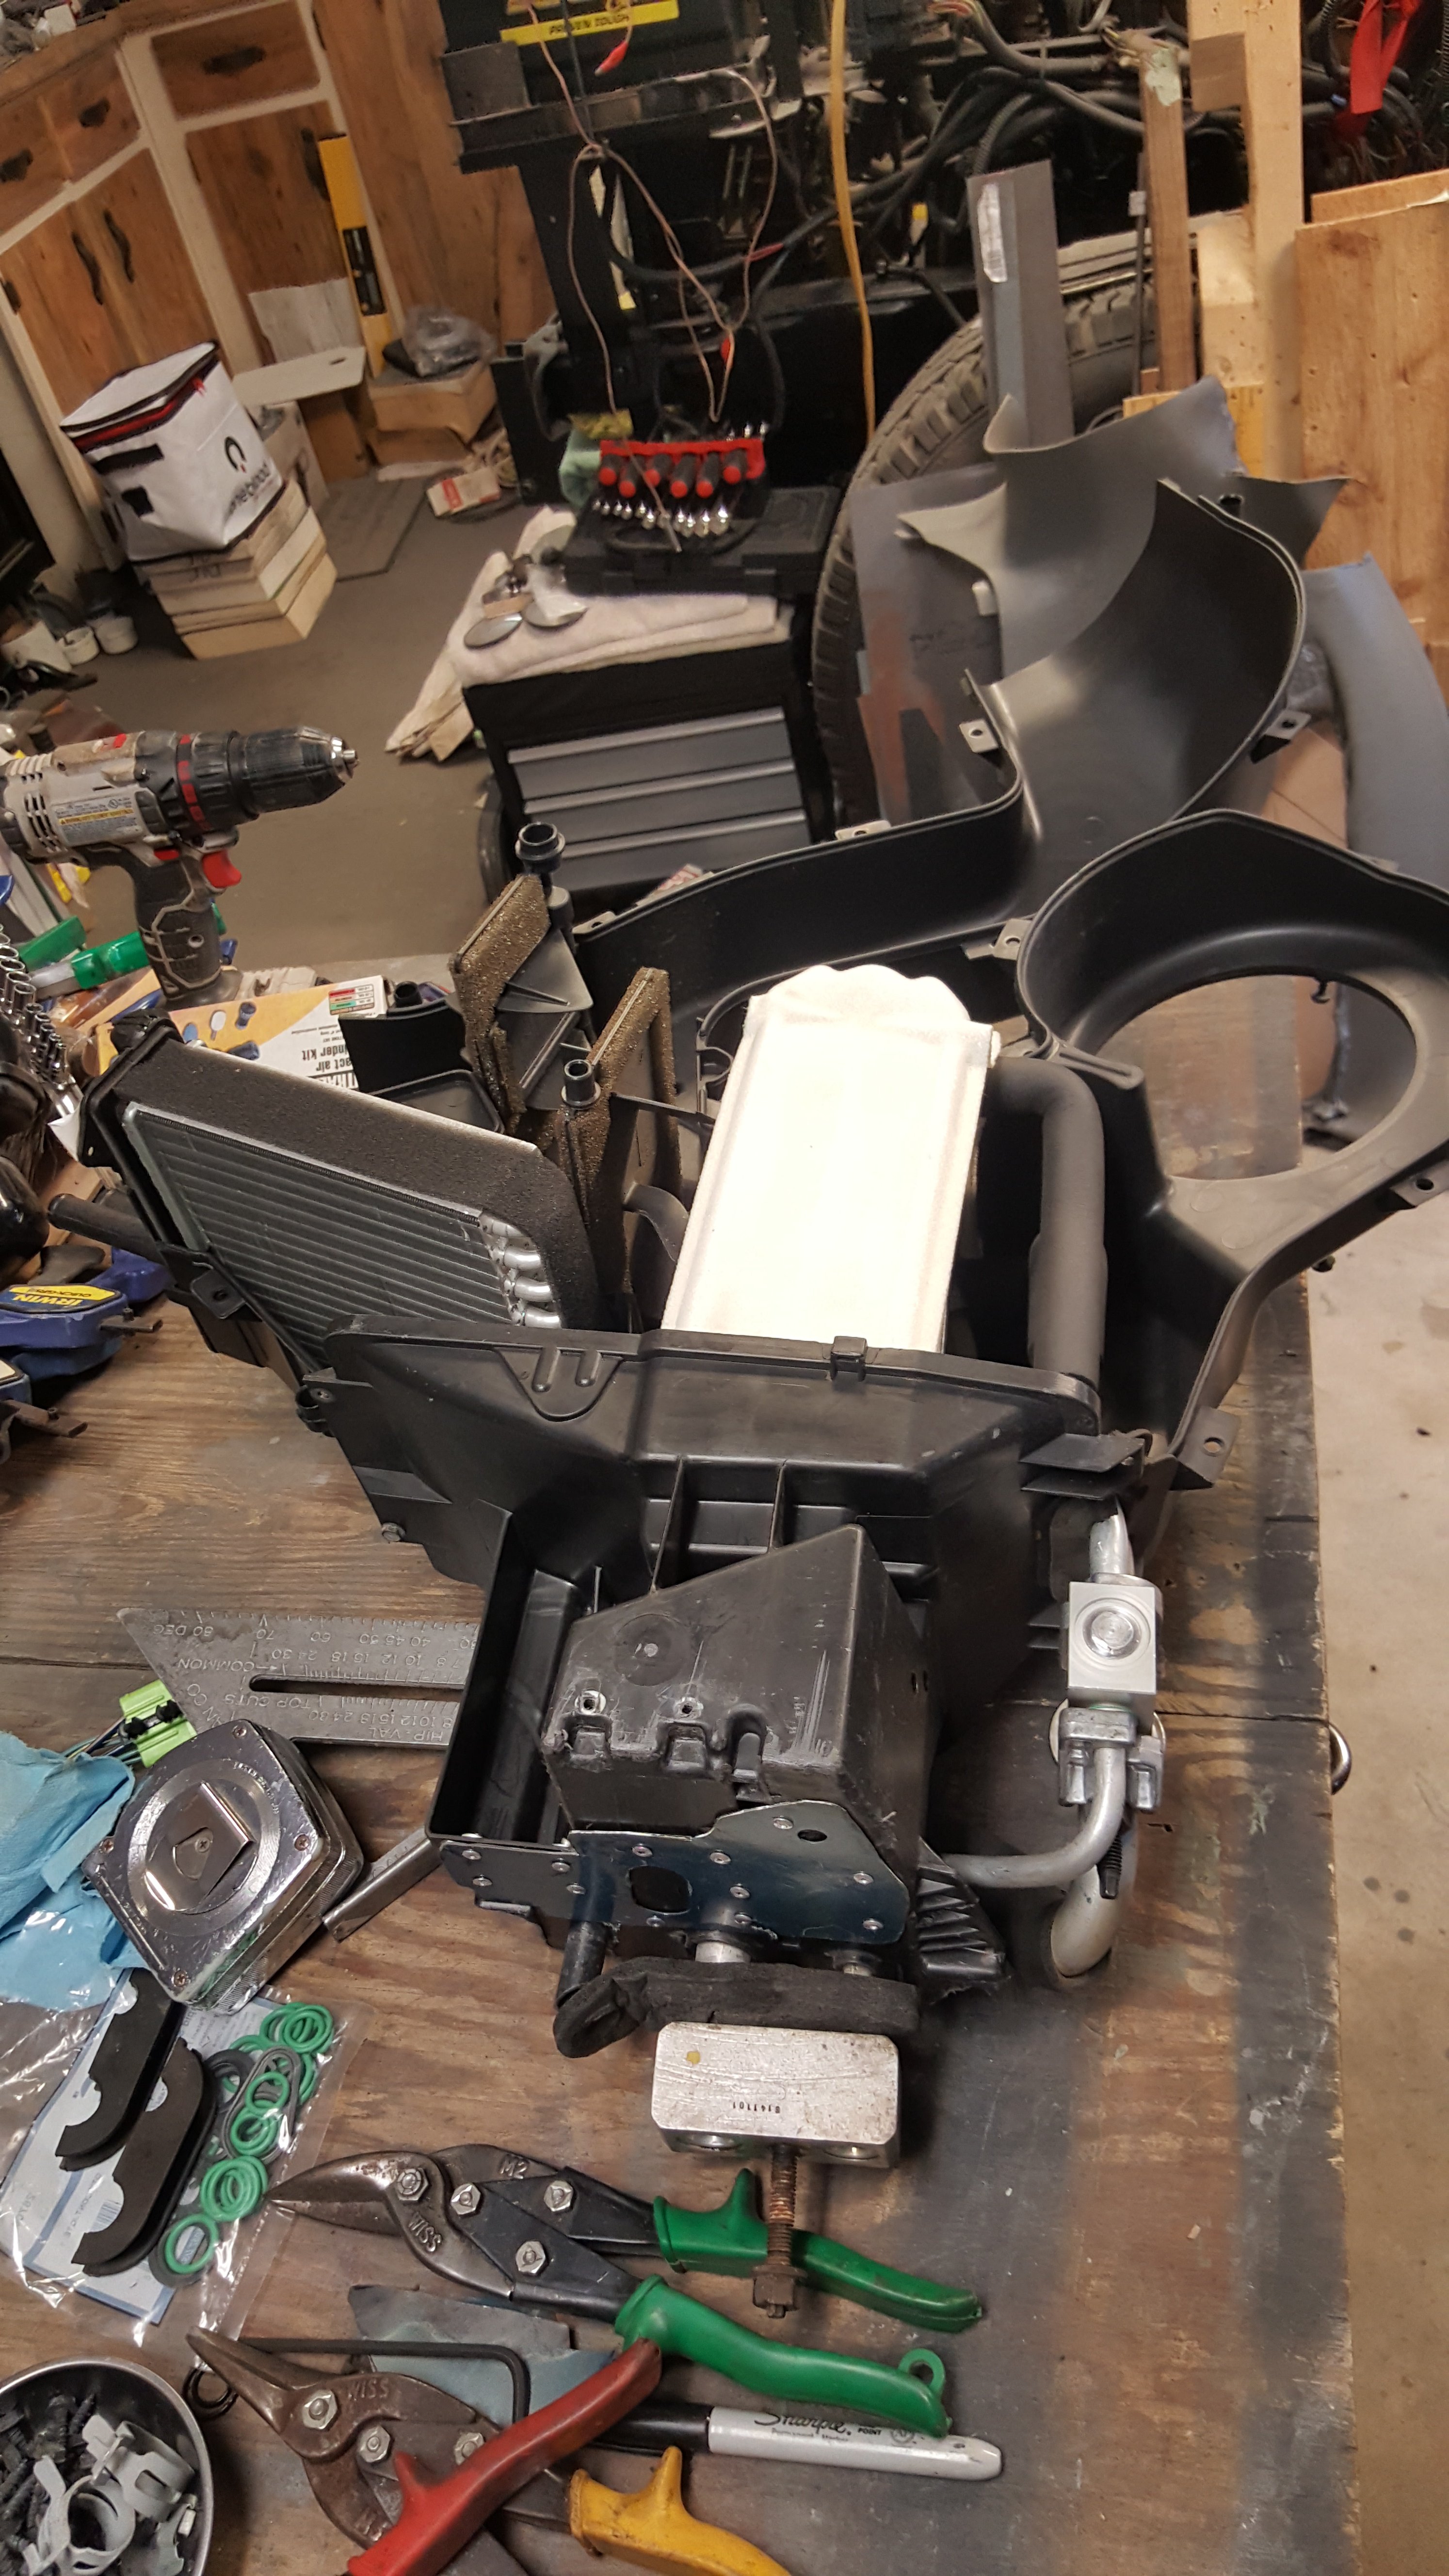
The evaporator core (white object in the center) and heater core (angled off to the left) are in place. |

Now comes the challenge to put the two replacement unit halves together and get everything to fit like it did at the factory (the new "exact replacement" parts are not "exact replacements", just 'close enough' to allow the necessary "adjustments" to get it back together). |
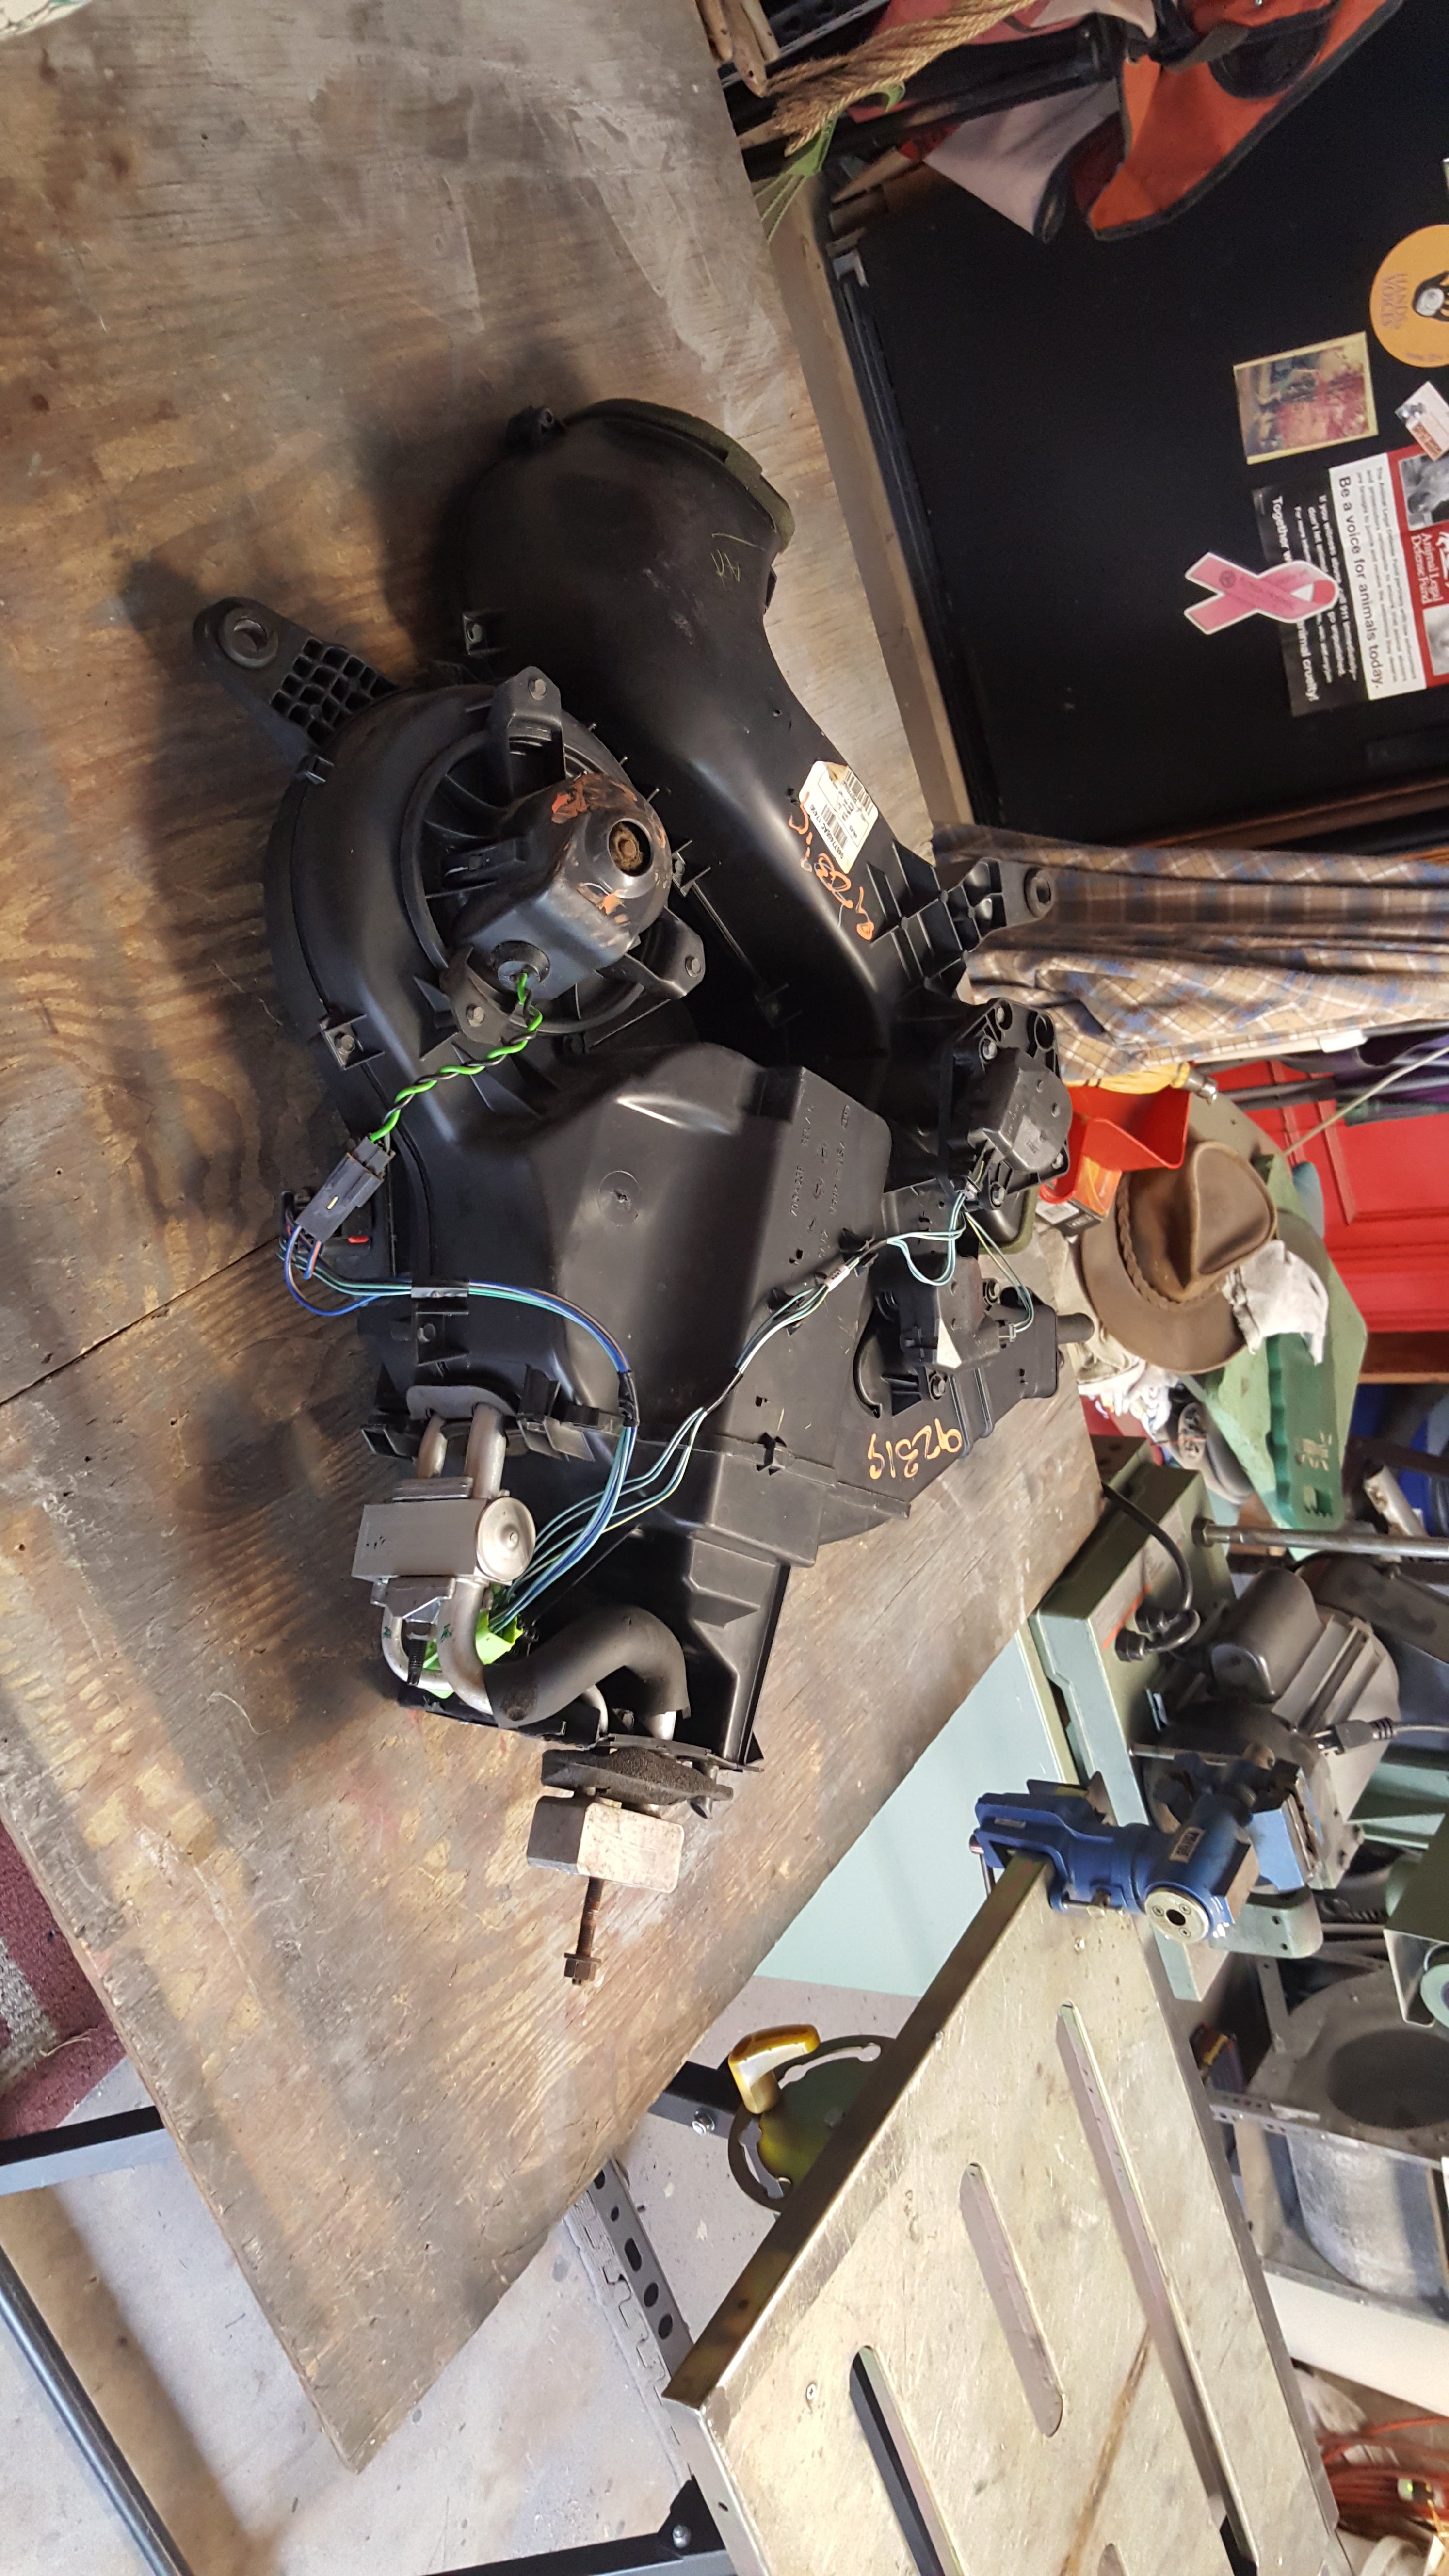
After some 'bending', 'flexing', and other 'adjustments', the two unit halves are back together ... backside view. When things are advertised as "exact replacements" ... plan of having to 'make some adjustments' to make it work. |
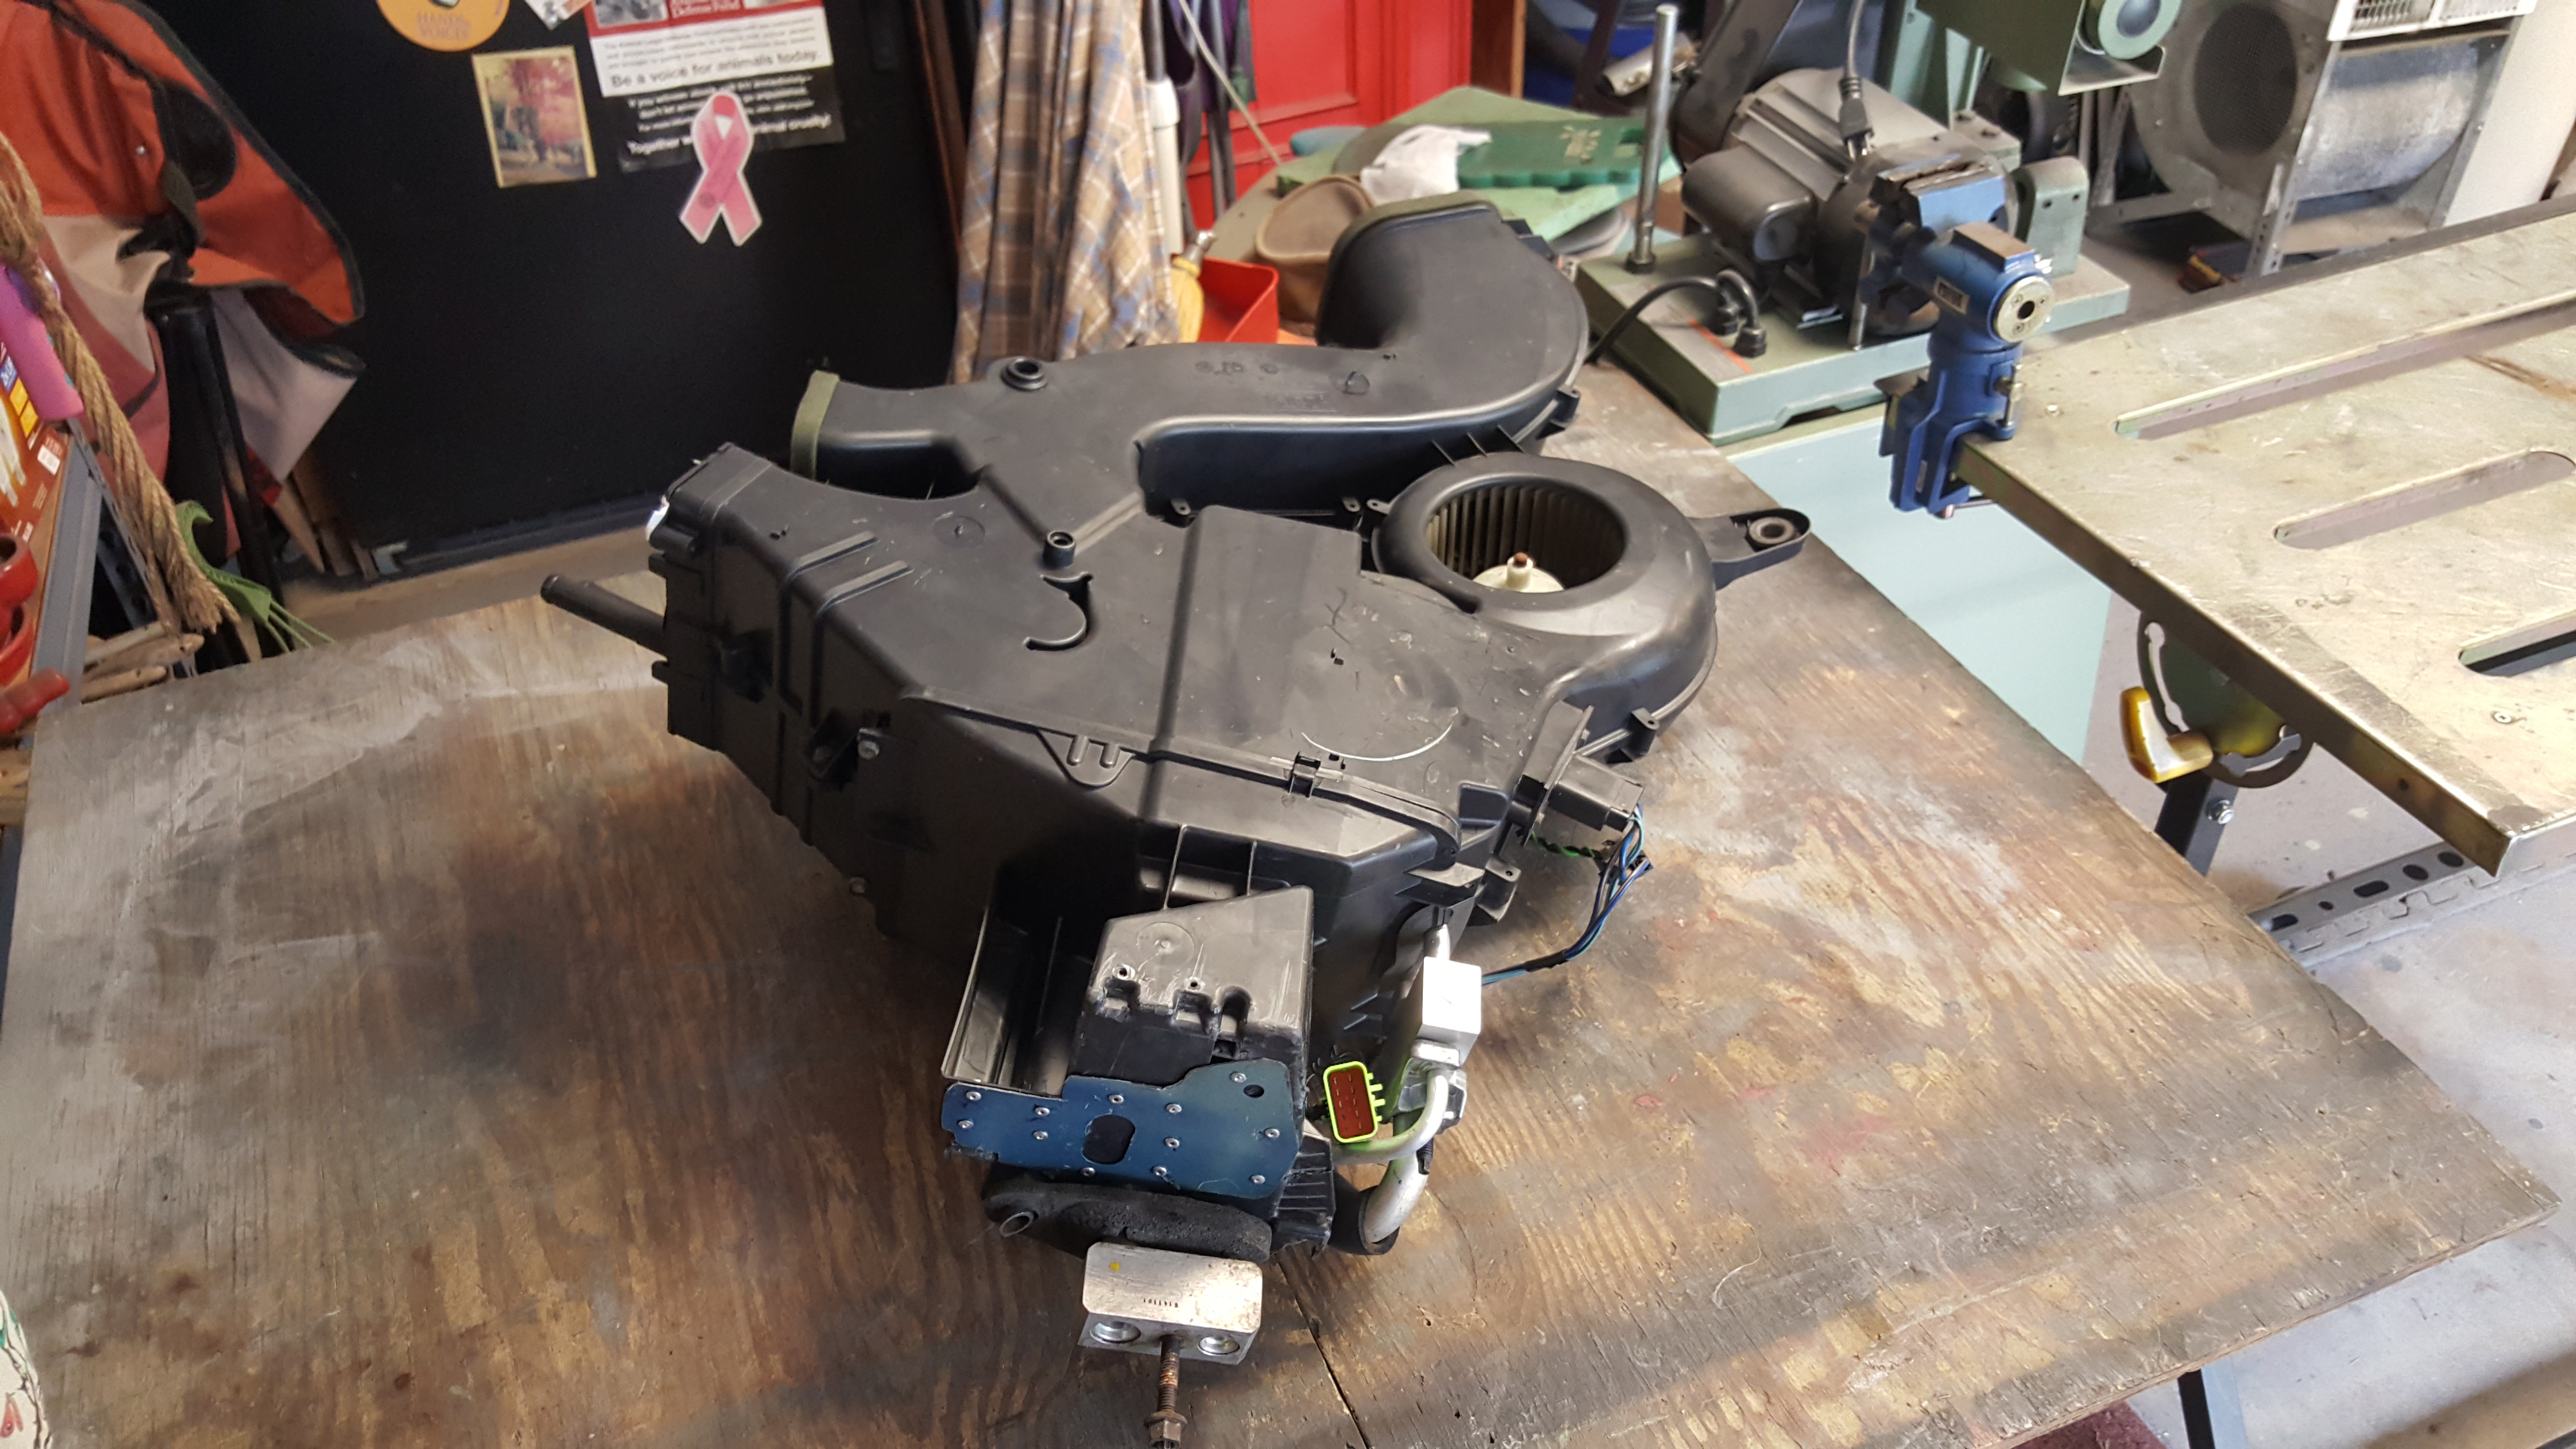
Frontside view of the assembled unit. Now go back and look at the backside view ... see the blower motor, the blend door operating motors?\ Yeah, they are on the BACKSIDE ... the entire unit needs to be removed to work on or replace those motors! Just a little bit of engineering forethought at the factory and those the units could have been designed to allow access to those motors from the frontside ... but no ... "servicability" is apparently not part of their engineering vocabulary. |

The unit is installed back into Dodge Grand Caravan (except the heater ductwork is not re-installed yet, but that is easy to do). |

After the heater ductwork re-installed, the unit is complete and the replacement interior trim pieces are installed. |
Air conditioning sytem was evacuated to 22 microns with a two stage vacuum pump, shut pump off and disconnected it, closed valves for overnight test. Still holding at 22 microns the next morning. Recharged air conditioning system. Almost 3 weeks from the date of the fire and it is back to where it was before the fire. Things happen ... ... two steps forward, one step back ... ... but that is still 'forward progress'. |
|
2019-10-08 video #1 |
2019-10-08 video #2 |
Did not take time lapse video of the next work - grinding, wire brushing, sanding, painting, and watching paint dry. |
Been there, done that, already checked "watch paint dry" off the bucket list. |
|
2019-10-10 video #1 |
Ran out of MIG welding gas (Argon/CO2 mix) and had to go exchange the empty cylinder for a full cylinder. |
2019-10-10 video #2 |
|
|
2019-12-01 video #1 |
Note: There was a lot of scrubbing and cleaning of the panels outside where water would not make a mess in the garage. |
2019-12-01 video #2 |
After a wipe down with alchol and final drying, two coats of clear adhesion promoter are applied. Next come coats of white to cover the darkness of the gray so the final top color shows properly (without gray showing through the somewhat transparent top coating). Then the top coating color of Flame Red goes on. There is time between each of the multiple coats to allow each coating to flash before the next coating is applied. |
|
2019-12-14 video #1 |
2019-12-14 video #2 |
|
|
 2019-12-17 Interior panels painted red and installed Right side center and rear |
 2019-12-17 Interior panels painted red and installed Left side center and rear |
 2019-12-17 Interior panels painted red and installed Both sides and tailgate |
 2019-12-17 Interior panels painted red and installed Looking from tailgate toward front |
 2019-12-17 Interior panels painted red and installed Driver's door |
 2019-12-17 Interior panels painted red and installed Passenger's door and "A" pillar |
 2019-12-17 Interior panels painted red and installed "A" pillar and front section of dash |
 2019-12-17 Interior panels painted red and installed With Sto-N-Go 'seats up' for passengers. |
|
Performed work on the chassis during the skipped over time. The big time consuming item was replacing the timing chains - most engines have one (1) timing chain, located at the front (front) of the engine. However, the Ford 4.0L SHOC (Single OverHead Cam) engine has ... four (yes, 4) timing chains ... and one (1) is in the back (yes, a timing chain in the back) of the engine. AND ... the lower sprocket of the rear timing chain is ... below the top of the transmission bell housing, so the engine has to be pulled all the way out just to replace the timing chains. The end result was good, though, the timing chain guide for the rear timing chain was broken - so the effort was worth it. |
|||
|
2020-04-15 video #1 |
|
|
|
|
2020-04-16 video #1 |
|
|
|
|
2020-04-17 video #1 |
|
|
|
|
2020-04-18 video #1 |
Nope, that's not going to work the way I want it to, on to Plan B. |
2020-04-18 video #2 |
Dang it, that's not going to work the way I want it to either, so ... starting with Plan C. |
|
Dang nabbit! Plan C didn't even work in my head ... or when sketched out, so ... back to Plan A ... with revisions! |
2020-04-19 video #1 |
2020-04-19 video #2 |
|
|
2020-04-25 video #1 |
2020-04-25 video #2 |
2020-04-25 video #3 |
|
|
2020-04-26 video #1 |
2020-04-26 video #2 |
|
|
|
2020-04-28 video #1 |
I increased the size of the moving parts, both the sliding mechanism and the moving panel. |
Adding additional guides to hold the larger moving mechanism and panel steady at top and bottom. |
The additional top guide was added today. The additional bottom guide will be added next. |
|
2020-05-06 video #1 |
2020-05-06 video #2 |
2020-05-06 video #3 |
|
|
2020-05-07 video #1 |
Should have been two videos - a longer first video (the camera apparently malfunctioned and did not record anything) - an even longer second video (the camera started recording, then shut itself off) |
Sending that new camera back and ordering a replacement camera |
|
|
2020-05-13 video #1 |
2020-05-13 video #2 |
|
|
|
2020-05-19 video #1 |
2020-05-19 video #2 |
|
|
|
|
|||||
| Contact Me | © 2017, 2018, 2019, 2020 JerryPeck | ||||
|
|
|||||